Carpet tack strips are thin pieces of wood embedded with sharp nails or tacks, specifically designed to hold carpets in place on the floor. Often installed along the perimeter of a room, these strips secure the edges of a carpet after it has been stretched to fit the room perfectly. They are critical for carpet installation as they help to prevent the material from slipping and sliding, creating a smooth and firm surface to walk on. Each strip is equipped with two rows of nails; one row is nailed directly into the floor, and the other, slanted upward, grips the carpet securely. Although most commonly used with wooden subfloors, they can also be affixed to concrete floors, typically using specially designed concrete nails.
Importance of removing carpet tack strips safely
Removing carpet tack strips safely is of utmost importance in maintaining the structural integrity of your concrete flooring and for personal safety reasons. These strips, while small, are incredibly sturdy and are typically nailed into the floor to secure carpets. Once you’ve decided to remove carpets, these tough strips become potential hazards. If not removed properly, they could cause significant damage to your concrete floor or even cause personal injuries due to the sharp nails and hard edges. Besides, poorly-done removal jobs can leave unsightly debris and adhesive residue, creating more work and more potential for property damage. Therefore, it’s essential to proceed carefully and take all necessary precautions when removing carpet tack strips.
Items Needed For Carpet Tack Strip Removal
List of necessary tools
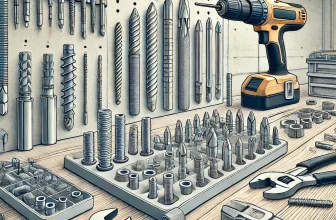
To ensure an effective and efficient removal of carpet tack strips from concrete, there are specific tools that you’ll need to have on hand. The list is fairly straightforward, and you can typically find these tools in any hardware store.
- Pry Bar: This is a necessity as it will allow you to pry up the carpet strips from the concrete.
- Utility Knife: Ideal for cutting through the carpet for easier handling.
- Hammer: Useful for loosening the tack strips from the concrete surface.
- Needle Nose Pliers: Handy for pulling out any stubborn nails left in the concrete.
- Scraper: Helpful in scraping off any residual adhesive or padding left on your floor.
- Trash bags or a Sufficient Disposal Container: To carefully dispose of the removed materials.
- Concrete Patch: To fill the holes left by the nails in the concrete surface.
Stocking up on these tools before the removal process will ensure a smooth and efficient operation. Having the right tools at your disposal will not only make the job quicker but also significantly safer.
Protective gear recommendation
In order to ensure your own safety while removing carpet tack strips, it is highly recommended to use protective gear. It’s not uncommon for accidents to happen during the process, because these strips routinely contain many sharp nails that can potentially cause injuries if mishandled.
For starters, heavy-duty gloves are an absolute necessity. Opt for materials like leather that can withstand punctures from the sharp nails in the tack strips.
Safety goggles are also imperative to protect your eyes from dust and debris that might be kicked up during the ripping and removal process.
When dealing with concrete floors, knee pads are another crucial piece of protective gear. These will provide comfort and minimize damage to your knees when you’re kneeling on the hard concrete surface.
Lastly, it could also be beneficial to wear thick-soled, protective footwear. Debris and nails could present a safety hazard on the floor and having adequate foot protection can save you from potential foot injuries.
In conclusion, removing carpet tack strips from concrete may be a challenging task and having suitable protective gear will ensure your safety.
Steps to Remove Carpet Tack Strips from Concrete
Initial Preparations
Safety Checks
Before you begin tackling the task of removing carpet tack strips from concrete, safety should always be your top priority. First and foremost, ensure that your work area is well-lit. This not only prevents accidents caused by poor visibility, but it also allows you to properly gauge the depth and layout of the tack strips and nails.
Then, take a close look at the floor. Make note of the locations of the carpet tack strips and identify any protruding nails. These could become hazardous when you begin cutting and removing the carpet. Several of the tools involved in this process are sharp, and mishandling could result in injuries.
One should also be cautious of electrical wire pathways. If you’re not sure about the pathways, it might be worthwhile to turn off the power while working in the room, to mitigate any potential electrical hazards. Also, if the carpet or padding feels moist, check for possible leaks or water damage before proceeding.
Finally, ensure that you have all the required tools within arm’s reach. This includes a utility knife, pry bar, pliers, and safety gear like gloves and goggles. Having everything nearby will lessen the chance of accidents caused by rushing or being distracted while trying to grab something out of reach.
Taking these safety precautions may add a bit of extra time to your project, but it will help you avoid accidents and injuries, ensuring a smoother and safer process overall.
Clearing the area
Before beginning the removal process, making sure the area is clear is essential. Start by moving all furniture and other obstructions from the room. This includes coffee tables, chairs, potted plants, storage boxes, and anything else that may hinder movement around the room.
If your room has doors that open into it, consider removing them to create more space. Depending on the type of door, it can usually be simply lifted off its hinges.
Pro tip: Be strategic about where you place removed items. Organize them in such a way that they won’t be in the way when you begin the process of disposing of carpet, padding, and tack strips.
Next, be sure to clean the floor. This might seem counterintuitive given that you’re about to tear up the carpet, but important nonetheless. A clean work area minimizes the chance of slipping on dust or debris and also helps to prevent any existing dirt from becoming deeply embedded into the concrete as you remove the carpet. A simple sweep should be enough.
Bear in mind that this stage of clearing the area will set the stage for the later steps in this project. Taking your time to get this preparation stage right would save you some hassle down the line.
Removing the Carpet and Padding
Instructions on how to cut the carpet into strips
Begin the carpet removal process by using a utility knife. It’s recommended that you slice the carpet into two-foot-wide strips to make the task manageable. Choose a corner of the room to start and use pliers to gently pull up the carpet edge. Hold it up with one hand, and with the other, cut the carpet with the utility knife along the width of the room.
The sharper your blade, the easier the cutting will be, so consider switching out blades after a few cuts to maintain efficiency. Remember to cut the carpet face-up to avoid unnecessary dulling of your blade. Be careful not to apply too much force, or you risk slicing into the concrete below. You may need to make a couple of passes with your knife to cut through the carpet fully.
Once you’ve cut the first strip, fold it over and begin to roll it up. Secure it with duct tape to prevent it from unrolling. This not only will make it easier to handle, but also more convenient for disposal. Afterward, proceed with the subsequent strips until the entire carpet is removed.
Guide on removing the carpet padding
Once you have successfully cut and removed the carpet strips, the next step is to tackle the carpet padding. Though it may be glued or stapled down, the padding is typically less difficult to remove than the carpet itself.
Start this process by locating a corner or edge of the padding and use your pliers to grip and pull it away from the floor. In the absence of pliers, gloved hands can serve alternatively. If your padding is stapled to the floor or the tack strip, do not worry. Try to pull these up along with the padding. If they remain in the floor, they can be removed later with a flat head screwdriver or pliers.
Like the carpet, make the removal easier by cutting the padding into strips that are about a foot wide. Once cut, these can be rolled up and secured using duct tape or box packing tape for easy disposal. Remember to remove padding gently to prevent tearing, which could lead to smaller pieces that are harder to handle.
Also keep in mind that some types of carpet padding may be glued directly to the concrete, especially in older homes. In such cases, use a floor scraper with a sharp blade to scrape off the padding and the adhesive underneath it. Follow-up with a wire brush if necessary to ensure a clean concrete floor.
Double-check to ensure all padding and staple remains have been fully removed before proceeding to the next step – tackling the tack strips.
Removing the Tack Strips
Detailed process of prying up the strips
To effectively remove the carpet tack strips from your concrete surface, the first step is quite simple yet critical. You need to identify the edge of the tack strip, which is usually slightly raised off the floor due to the nails holding it in place.
With the edge identified, you’ll want to use a pry bar or a similar tool to gain leverage. Position your pry bar under an edge of the tack strip and apply pressure to lift the strip away from the concrete. Start at one end and work your way down, lifting each nail from its embedded spot.
Take care not to force the strip up too quickly, as this can result in broken or splintered pieces which can pose additional hazards. Instead, use steady, even pressure to slowly lift the strip.
Once the strip is free, gently rock it back and forth to help fully dislodge any nails that might still be stuck in the concrete. Be sure not to remove the strip too quickly as there might still be nails that are stuck tightly to the concrete which needs a little bit more effort to remove. Continue this process for all remaining carpet tack strips.
Remember, patience is key when prying up the strips – you don’t want to damage the concrete underneath or cause injury from a suddenly released, rogue nail.
Tips on handling the nails sticking out of the strips
Handling the nails that protrude from the removed tack strips may pose certain difficulties. These nails are not only sharp, but they can also be rusty and broken which presents a serious risk of injury. Here are a few useful tips to keep in mind:
- Use Pliers: Always use a good pair of pliers to remove any nails sticking out of the tack strips or concrete floor. Firmly grasp each nail with the pliers and leverage it out carefully. Never attempt to pull nails out with your bare hands.
- Work Slowly: Don’t rush the process. Take your time to remove each nail; hasty removals increase the chance of accidental slips and injuries.
- Check for Hidden Nails: After removing the visible nails, run the flat side of a scraper over the area where the tack strips were. Listen for the tell-tale clicking sound of hidden nails just beneath the surface.
- Magnet Sweeping: Once all the nails are thought to be removed, run a strong magnet over the area. The magnet will pick up any remaining metal fragments that might be hidden in the floor debris.
Remember, safety should be your paramount concern while dealing with these nails. Always wear protective gloves and safety glasses to guard against accidental injuries.
Cleaning Up the Residue
Instructions for removing the adhesive
After successfully removing the tack strips, you’ll find remnants of adhesive on your concrete floor. Getting rid of this sticky residue is a necessary step to ensure a smooth, clean surface that’s ready for your next flooring project.
Start by scraping off as much adhesive as possible using a putty knife or a floor scraper. It’s crucial to approach this task gently to avoid damaging your floor. Hold the tool at a 45-degree angle and apply even pressure, scraping in the direction of the grain of the concrete.
For stubborn adhesive, it helps to use a commercially-available adhesive remover. Make sure to choose one that’s safe for concrete. Follow the instructions on the product label, usually involving applying the remover to the glue, allowing it to sit for a designated time, and then scraping it off.
If traces of the adhesive still remain, you can use a soft-bristled brush and warm, soapy water to scrub the floor gently. After scrubbing, rinse the floor thoroughly using water and mop it dry.
In case of extremely stubborn residue, consider using a professional-grade floor grinder. It not only helps remove the adhesive but also offers the added advantage of smoothing your floor surface. However, this option requires specialized knowledge and equipment, it may be best to hire professionals.
Remember, removing adhesive from concrete is a time-consuming process, so patience is key. Continually reassess the floor after each cleaning process to determine your next steps.
Recommendations on filling the holes left by the nails
Filling the holes left by the nails is the last, yet crucial step in cleaning up after the removal of carpet tack strips. To achieve a smooth surface, follow these steps:
First, you will need to purchase a concrete filler or patching compound compatible with your concrete floor. These can be found at your local hardware store. Make sure to follow the instructions on the product since mixing and curing time can vary.
Start by sweeping and vacuuming the area to ensure it’s free of debris. This will ensure the filler adheres properly to the concrete. Then, using a putty knife or a similar tool, apply the filler into each hole, making sure it’s filled to the same level as the rest of the floor. If the hole is particularly deep, you may need to apply the filler in layers, allowing each one to dry before applying the next.
Once you’ve filled all the holes, let the filler dry according to the manufacturer’s instructions. After it’s dried, use a sanding block or an electric sander to smooth out any uneven surface. Remember to clean up the dust from sanding before proceeding to the next step in your flooring project.
By carefully filling the holes left by the nails, you’re preparing your concrete floor for the next cover, be it new carpeting, tiles or paint. The smooth, hole-free surface will enhance the finish and longevity of your new floor.
Safety Measures to Consider
Importance of wearing protective gear
Ensuring personal safety is paramount when working on any home improvement projects. When removing carpet tack strips from concrete, you are dealing with potentially dangerous tools and materials that can cause injuries. Consequently, wearing suitable protective gear is necessary during the entire process.
Start with a good pair of work gloves. These not only offer protection against the sharp nails on the tack strips but also provide a better grip which is quite useful when prying up the strips with tools. Puncture-resistant gloves can be particularly helpful in this regard.
Eye protection is another crucial safety measure. Safety glasses or goggles guard your eyes from small debris, particularly when slicing the carpet into strips or chiseling away at adhesive residue. The eyes are highly vulnerable to sharp, flying objects hence it’s essential to shield them.
Since the tack strips have been secured onto the concrete with nails, there might be splinters or tiny fragments chipping away during the process. Therefore, sturdy footwear – preferably steel-toed shoes – is recommended to protect your feet.
Lastly, given the possibility of airborne dust particles, a basic face mask or a respirator is advised. This prevents the inhalation of dust or tiny fragments of the carpeting or tack strips that can induce respiratory complications.
In conclusion, personal protection gear is important to preserve your health and safety during this entire process. Your gear does more than just protect you – it allows you to work confidently and efficiently without worrying about potential injuries.
Safe disposal of tack strips
Proper disposal of carpet tack strips is crucial not just for your safety but for the safety of those handling your trash as well. After removing the tack strips, you should keep all the pieces together and, if possible, in one piece. To prevent any accidental injury, put all the tack strips in a durable waste bag or cardboard box. This will help shield their sharp points and stop them from puncturing the waste bag.
Once packed securely, you can dispose of the tack strips according to the regulations of your local waste disposal service. Some jurisdictions may consider them construction waste, so be sure to check with them first. If they don’t accept construction waste, there are disposal companies that can take it with a small fee.
Also remember that if you hired the services of professionals to pull up your carpet and remove the strips, disposal is often part of their service package. You should inquire about this during the hiring process.
Ensuring safe disposal of carpet tack strips not only protects you, but also sanitation workers and the environment. Always remember, safety should be your top priority when handling and disposing of these potentially hazardous materials.
Conclusion
Reiteration of the importance of safe removal and disposal
Executing the removal of carpet tack strips from concrete with care and proper safety measures cannot be overstated. Remember, the process involves sharp nails and rough edges that can inflict injury if mishandled. Ensuring that you have the necessary protective gear prevents any unexpected accidents. Furthermore, appropriate disposal of the tack strips keeps your environment safe for everyone, eliminating potential hazards posed by these small objects. Safeguarding your personal safety, as well as others’, while maintaining the integrity of your concrete floor, is a reflection of effective DIY home improvement procedures.
Positives of a clean removal job
Executing a clean removal job not only ensures that your concrete floor is ready for the next step in your renovation project, but also contributes to the overall safety of your work environment. Avoiding leftover nails or tack strip pieces prevents potential injuries, making the site safer for you and others involved in the work. Additionally, taking time for a clean removal can save you from potential problems down the road, such as stubborn adhesive residues that could interfere with the installation of a new floor covering.
Moreover, a well-done removal job speaks volumes about the quality of your workmanship. By paying attention to every step of the process, you showcase your commitment to a job well done. This care and dedication can translate into better overall results in your renovation project which will, without a doubt, bring about a sense of satisfaction and fulfillment.