Introduction
Brief overview of PEX pipe
PEX, or cross-linked polyethylene, pipe is a modern plumbing material that has gained popularity among homeowners and professionals due to its ease of installation, durability, and cost-effectiveness. It is a flexible pipe made from high-density polyethylene which undergoes a process called cross-linking, resulting in a material that can withstand high temperatures and resist corrosion. PEX pipe is commonly used for indoor plumbing applications, radiant floor heating, and outdoor water distribution systems.
One critical aspect of working with PEX pipe is ensuring that it is straight during installation for optimum performance and aesthetics. This article will provide guidance on how to straighten PEX pipe, a skill that will simplify the installation process and help you create a clean and professional-looking plumbing system.
Importance of straightening PEX pipe for proper installation
PEX (cross-linked polyethylene) pipe has become increasingly popular in plumbing systems due to its flexibility, durability, resistance to corrosion and chemicals, and cost effectiveness. Despite these advantages, it is of utmost importance to ensure that PEX pipe is adequately straightened before installation. This guarantees that the piping system functions optimally and avoids potential problems down the line.
Straightening PEX pipe is essential for several reasons. First and foremost, it helps to prevent potential kinks and leaks, which could result in water damage or reduce the lifespan of the piping system. Additionally, a straightened pipe is more aesthetically pleasing in exposed installations, creating a more professional and visually satisfying appearance. Lastly, straightening PEX pipe can make the cutting, connecting, and securing processes easier, ensuring a more efficient and time-saving installation.
In this article, we will discuss the tools and materials needed, various methods of straightening PEX pipe, helpful tips, and possible challenges you may encounter during this process. By following these guidelines, you can ensure the successful installation of your PEX piping system.
Benefits of using PEX pipe
Durability and reliability
PEX pipes, short for cross-linked polyethylene pipes, are known for their exceptional durability and reliability. These properties make them an increasingly popular choice among homeowners, builders, and plumbers for various applications.
One of the main reasons for their durability is the high resistance PEX pipes offer against corrosion and mineral buildup. Unlike metal pipes, which can corrode over time and become prone to leaks, PEX pipes stand the test of time, maintaining their structural integrity and function. The cross-linked molecular structure of the material gives the pipe the ability to expand and contract without losing form, thereby reducing the risk of bursting in freezing conditions or developing cracks from typical wear and tear.
Furthermore, PEX pipes demonstrate extraordinary resilience against various chemicals found in most plumbing systems. They are resistant to the effects of many water disinfectants, such as chlorine, ensuring a longer lifespan for the piping system. This resistance to chemicals makes PEX pipes an ideal solution for homes with hard water as they are less susceptible to the negative impact of such water conditions.
Another important aspect of the reliability of PEX pipes is their ability to withstand high water pressure. They can endure pressures up to 160 PSI at 73.4°F (23°C) and between 80-100 PSI at higher temperatures, making them suitable for most residential and commercial applications. This strength, coupled with their inherent flexibility, allows PEX pipes to easily handle water hammer and other sudden pressure changes, resulting in fewer incidents of pipe failure due to stress.
The durability and reliability of PEX pipes ensure long-lasting plumbing systems that require minimal maintenance or replacements. Their resistance to corrosion, chemical exposure, and extreme temperatures make them a cost-effective and long-term solution for a wide range of plumbing applications.
Flexibility
PEX pipe’s flexibility is one of its standout features, making it a sought-after option for residential and commercial plumbing projects alike. This flexibility provides numerous advantages for plumbing systems, including simpler installation, reduced need for fittings and connections, and increased resilience against freezing temperatures.
The pliable nature of PEX pipes allows them to be easily bent around corners and obstacles, meaning fewer joints are required during installation. This not only saves time but also reduces potential leakage points, thus increasing the overall integrity of the plumbing system. Moreover, the reduced need for fittings helps to lower material costs, contributing to PEX plumbing’s cost-effectiveness.
Furthermore, the flexibility of PEX pipes reduces the risk of damage caused by water hammer or pipe expansion and contraction due to temperature fluctuations. This feature helps protect your piping system and prevents disruptions in water flow, ensuring a more reliable and hassle-free experience for users.
Another key advantage of PEX’s flexibility is its increased resistance to freezing temperatures. Traditional rigid plumbing materials, such as copper and PVC, are more susceptible to bursting when water inside the pipes freezes and expands. In comparison, PEX pipes can expand to accommodate frozen water and then return to their original size once the ice melts, making them a more resilient option for cold climates. This characteristic ultimately reduces the chances of costly repairs stemming from burst pipes during frigid winter months.
The flexibility of PEX pipes is a significant reason for their growing popularity in plumbing systems. This feature enables straightforward installation, reduces the need for additional fittings, and offers increased tolerance to thermal changes, ensuring more reliable and cost-effective plumbing solutions for both homes and businesses.
Cost effectiveness
Cost-effectiveness is another key advantage of using PEX piping in plumbing applications. PEX pipes are not only more affordable compared to other materials such as copper and CPVC, but also their ease of installation significantly reduces labor costs. Since PEX pipes can be quickly connected through mechanical fittings or expansion tools, the time-consuming soldering process associated with copper pipes is eliminated.
Moreover, PEX’s flexibility allows for fewer fittings and connections, reducing the overall material expenses. It also minimizes the chances of leaks and subsequent repairs, contributing to further cost savings in the long run. PEX pipes usually come in long coils, which helps to minimize wastage and additional expenses in joining pipes. Not only does this save time and money, but it also enhances the efficiency of the plumbing system.
Another cost-saving factor with PEX pipes is their excellent thermal resistance, which means they lose less heat as water travels through them. This makes PEX piping a better option for hot water lines in terms of conserving energy and keeping the utility bills low.
The cost-effectiveness of PEX pipes is a result of various factors, including affordability, ease of installation, fewer fittings, and reduced energy consumption. With these benefits, PEX pipes have become a popular choice for both professional plumbers and DIY enthusiasts in residential and commercial plumbing projects.
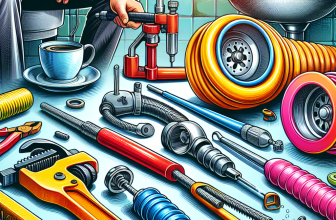
Tools and materials needed
Heat source (heat gun or torch)
A crucial component in the process of straightening PEX pipe is the heat source. There are two commonly used options: a heat gun and a torch. Choosing the right heat source depends on your preference, budget, and the specific requirements of your project.
A heat gun is an electric device that generates a stream of hot air, typically between 200°F to 1,200°F. For straightening PEX pipes, it is essential to use a heat gun with adjustable temperature settings to avoid overheating and damaging the pipe. Heat guns are available in various sizes and models, ranging from simple and lightweight to heavy-duty, industrial-grade devices. When using a heat gun, plug it into a suitable electrical outlet, put on heat-resistant gloves and protective eyewear, and hold the device at a safe distance from the PEX pipe while applying heat. Ensure that the heat is distributed evenly along the section of the pipe you want to straighten.
A propane torch can effectively serve as a heat source for straightening PEX pipes. When using this method, it is crucial to handle the torch carefully and wear proper safety gear, including a heat-resistant glove and protective eyewear. Propane torches are highly portable and can deliver intense heat, which makes them suitable for straightening both small and large pipes. However, users should exercise caution as propane torches generate open flame, and they must avoid direct contact with the pipe to prevent burning or melting. To use a propane torch for straightening PEX pipes, ignite the torch and adjust the flame to a suitable intensity, aim the flame at the pipe from a safe distance, and move it slowly and evenly along the section of the pipe you want to straighten.
Both heat guns and propane torches are effective tools for straightening PEX pipes, though they come with distinct advantages and some safety concerns. Your choice will depend on factors such as availability, comfort in usage, and the pipeline size. Regardless of which option you choose, carefully follow the guidelines for using these devices to ensure a safe and effective straightening process.
PEX pipe straightener or pipe press (optional)
A PEX pipe straightener or pipe press is an optional but highly useful tool for straightening PEX pipes. This device is designed specifically to straighten PEX tubing and can significantly reduce the time and effort needed to achieve straight, even pipes. Pipe straighteners come in various sizes and designs, with some being handheld and others being larger, bench-mounted units.
When choosing a PEX pipe straightener, it is important to select the right size for the tubing you are working with. Most straighteners are adjustable, allowing you to work with a range of PEX pipe sizes. If you plan to work with multiple sizes of PEX pipe regularly, investing in an adjustable straightener can be a wise decision.
Using a PEX pipe straightener or pipe press is quite simple. Begin by inserting the curved or kinked section of the PEX pipe into the straightener. Apply steady pressure by either pulling the handles together (for handheld models) or turning the crank (for bench-mounted models) to press the pipe between the straightening rollers. As the pipe is pressed between the rollers, it becomes straight and uniform in shape. Keep applying pressure until the desired straightness is achieved, then release the pipe from the straightener.
While using a PEX pipe straightener or pipe press is not mandatory, it is a helpful tool for ensuring optimal straightness of PEX pipes without the need for a heat source. This method can provide consistent results and be a valuable addition to your PEX pipe installation toolkit.
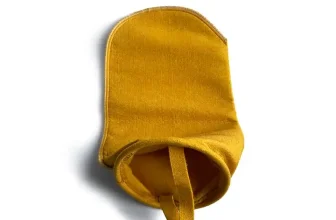
Heat resistant gloves
Heat resistant gloves are an essential component when it comes to straightening PEX pipes. These gloves protect your hands while handling heated pipes or using heat sources such as heat guns or torches during the straightening process. Although PEX pipes are generally safe to handle at high temperatures, protecting your hands from any possible harm is always good practice.
When selecting heat resistant gloves for straightening PEX pipes, consider the following factors:
- Material: Look for gloves made from materials that can withstand high temperatures, such as Kevlar, silicone, leather, or aramid fibers. These materials provide excellent insulation and protection against heat. Avoid using standard fabric gloves, as they may not offer ample protection from the heat during the straightening process.
- Comfort and fit: Choose gloves that fit snugly on your hands to ensure ease of use and dexterity when handling PEX pipe and tools. It is advisable to try on different sizes and styles to determine the best fit for optimal comfort and functionality.
- Grip: A good grip is crucial for safely handling heated PEX pipes and tools. Opt for gloves that offer a non-slip grip, allowing you to securely hold the pipe as you straighten it.
- Durability: Invest in high-quality heat resistant gloves that can withstand frequent use and the demands of the PEX pipe straightening process. Look for gloves with reinforced stitching and high-quality materials to ensure a long lifespan of use.
By including heat resistant gloves as part of your toolkit for straightening PEX pipes, you can ensure both safety and efficiency during the process.
Protective eyewear
Protective eyewear is a crucial safety item when working with PEX pipes, especially during the straightening process. As you apply heat to the pipe or use a pipe press, potential hazards may arise, such as heated pipe sections releasing hot steam or accidental slips with tools that could lead to injuries.
It is essential to use safety goggles, safety glasses, or a face shield to protect your eyes from any debris or steam that may be released while working on the PEX pipe. When selecting protective eyewear, make sure it fits securely and comfortably on your face, without obstructing your vision. This is crucial as clear visibility is required while working with pipes, particularly while measuring, cutting, and straightening.
Your chosen protective eyewear should have an ANSI Z87.1 rating, which guarantees it meets the safety standards required for different types of jobs, including pipe installations. This rating ensures that the eyewear can endure impacts and offer the best protection possible for your eyes.
Never overlook the importance of protective eyewear when straightening PEX pipes or engaging in any type of pipe installation work. Protecting your eyes from potential injuries should always be a priority, and investing in a reliable safety product will contribute to a smooth and secure working process.
Measuring tape
A measuring tape is a crucial tool when it comes to straightening PEX pipes because it enables the user to measure and cut the pipe accurately to ensure a proper installation. In order to measure the distance between fittings and determine the length of PEX pipe required, a measuring tape should be used in tandem with the pipe layout or plumbing plan. Furthermore, after identifying the sections of the pipe that need straightening, marking those segments using a measuring tape ensures precise and even heating during the straightening process.
It is recommended to use a sturdy measuring tape with increments in both inches and centimeters to cater to various measurement preferences. A retractable measuring tape is particularly useful as it allows for easy storage and prevents tangling. Choosing a measuring tape with a locking mechanism will ensure accurate measurements and maintain stability during the process.
A measuring tape is pivotal in the process of straightening PEX pipes since it guarantees that the length of the pipe is in accordance with plumbing requirements. Accurate measurements will facilitate a more efficient and effective straightening process, resulting in a professional finish and optimal functioning of the installed PEX pipes.
Marker or tape
Marker or tape plays a crucial role in the process of straightening PEX pipe. To achieve the desired level of precision and prevent mistakes, marking the specific sections requiring straightening is essential.
A permanent marker is an ideal tool for this task, as it allows you to draw visible lines on the PEX pipe. These markings serve as a guide during the straightening process and help track your progress. When selecting a marker, be sure to choose one that is waterproof and suited for various surfaces, ensuring its visibility on the pipe.
Alternatively, using colored tape is an effective way to indicate the sections of the pipe that need straightening. Simply wrap the tape around the pipe’s circumference at the points where straightening is necessary. This method offers the advantage of being easy to remove without leaving any residue on the pipe when the task is complete. When opting for tape, choose a bright color that contrasts against the PEX pipe’s color, making it easily noticeable during the straightening process.
Having a marker or tape as part of your toolkit is vital for a precise and successful PEX pipe straightening project. These items aid in identifying and tracking the sections that need correction, ensuring an accurate and efficient outcome.
Pipe cutter
A pipe cutter is an essential tool required for preparing your PEX pipe before straightening. These cutters are designed specifically for cutting through plastic pipes, ensuring a clean, straight cut without crushing or deforming the pipe’s shape. A proper cut is crucial for preventing leaks and providing a secure connection when installing the PEX pipe later.
When selecting a pipe cutter, it’s important to choose one specifically designed for PEX pipes or plastic pipes of similar thickness. Some popular options include scissor-style pipe cutters or rotating pipe cutters. Scissor-style cutters have a blade that slices through the pipe when the handles are squeezed, providing a straightforward cutting motion. Rotating pipe cutters, on the other hand, encircle the pipe and gradually tighten around it as the user turns a knob, cutting into the pipe as it rotates.
While using a pipe cutter, it’s crucial to ensure that the tool is correctly placed on the pipe and apply even pressure for clean and accurate cuts. Additionally, make sure the edges of the PEX pipe are smooth and burr-free after cutting to guarantee a leak-free connection.
A high-quality pipe cutter can save you time and effort when working with PEX pipes, and contribute significantly to the overall success of your project. By investing in a suitable pipe cutter, you can ensure that your PEX pipe is cut accurately, preparing you for the straightening process as well as future installations.
How to determine the length of PEX pipe needed
Measuring distance between fittings
To determine the length of PEX pipe needed for your project, it’s essential to accurately measure the distance between the fittings where the pipe will be installed. This helps to ensure a proper fit and prevent any leakage or loss of water pressure in the system.
Start by identifying the location of the fittings where the PEX pipe will connect – these may be fixtures, such as faucets or showerheads, or they may be junctions between different sections of pipe. Make sure both the starting and the ending points are clear and accessible to allow for easier measurements.
Using your measuring tape, measure the distance between the centers of the fittings, following the planned route of the PEX pipe. Be sure to account for any bends or turns in the route of the pipe while measuring, as this can impact the total distance needed. It is advisable to add a few extra inches to your measurement to account for any minor adjustments that might be necessary during installation.
Keep in mind that PEX pipe can expand and contract slightly over time and with changes in temperature. To account for this, professional installers often recommend adding a few extra inches of pipe when measuring the distance between fittings. This small additional allowance ensures that you have enough material to work with during installation and that your system will continue to function effectively over time.
After you have determined the length of PEX pipe required for your project, you are well on your way to start the straightening process to achieve a professional-looking installation.
Considering the bend radius
When determining the length of PEX pipe needed, it is crucial to consider the bend radius of the pipe. The bend radius refers to the minimum distance from the center of a pipe’s curvature to the edge of the pipe when bent without kinking or experiencing structural damage. Accounting for the bend radius will ensure that you have enough material to accommodate the connection points and any necessary bends or turns in the piping layout.
The bend radius of PEX pipe can vary depending on the size and type of the pipe. Generally, it is recommended to use a 5-to-1 ratio when calculating the minimum bend radius. This means that the bend radius should be at least five times the diameter of the PEX pipe. For example, if you are using a PEX pipe with a diameter of 1/2 inch, the minimum bend radius should be 2.5 inches (1/2 inch times five).
When measuring the distance between fittings, add extra length to compensate for the bend radius. This additional length will ensure that the PEX pipe maintains its integrity during and after installation. To do this, follow these steps:
- Measure the straight-line distance between the fittings where the PEX pipe will be installed.
- Identify any points in the layout where the pipe needs to bend or turn.
- Calculate the additional length needed for each bend or turn, using the 5-to-1 ratio and the pipe’s diameter.
- Add the additional lengths to the straight-line distance between fittings.
By considering the bend radius, you can accurately determine the length of PEX pipe needed for your project. This consideration helps ensure a successful installation, maintaining the integrity and longevity of the PEX piping system.
Preparing the PEX pipe for straightening
Cutting the pipe to the desired length
Before beginning the straightening process, it is essential to cut the PEX pipe to the desired length. This ensures that the finished pipe meets the specific requirements of your installation project. Here’s a step-by-step guide to cutting the PEX pipe:
- Use a measuring tape to determine the exact length of pipe needed for your project. Make sure to account not only for the distance between fittings but also for any protrusion into the fittings and extra length to accommodate bends or curves.
- With the required length in mind, use a marker or tape to visibly mark the cutting point on the PEX pipe. This clearly-defined line will guide the cutting process and ensure accuracy. When marking the pipe, it is best to draw a straight line around the circumference of the pipe to ensure an even cut.
- After marking the pipe, use a pipe cutter specifically designed for use with PEX piping. Pipe cutters typically come in two types – standard and ratcheting. Regardless of the type you choose, ensure that it is rated for PEX pipe to prevent damage to the material. Avoid using a handsaw or other inappropriate cutting tools, as they may result in jagged, uneven cuts, which can negatively affect the longevity and performance of the pipe.
- Position the pipe cutter at the marked cutting point, making sure the cutter’s blade aligns with the marked line. Gently squeeze the cutter’s handle to smoothly and evenly cut through the PEX pipe. If using a ratcheting pipe cutter, release and squeeze the handle in a repetitive motion until the pipe has been cut completely.
- Inspect the cut end of the pipe to ensure it is straight and clean. If necessary, use a deburring tool or utility knife to remove any burrs or irregularities from the edge of the pipe. This will help ensure a tight seal when connecting the pipe to fittings or other components.
With the PEX pipe cut to the desired length, you are now ready to mark sections that need straightening and proceed with the straightening process. Properly cut and straightened PEX pipes will help ensure a successful installation and long-lasting performance.
Marking the sections of the pipe that need straightening
Before straightening the PEX pipe, it is essential to identify and mark the sections of the pipe that require straightening. This not only saves time, but also ensures the affected areas are properly treated. To mark the sections, follow these steps:
- Inspect the PEX pipe thoroughly: Begin by visually assessing the entire length of the pipe, paying close attention to bends, kinks, or sections that appear uneven or misshapen. These are the areas that will require straightening.
- Use a flat surface: Lay the PEX pipe on a flat and stable surface, such as a workbench or the floor, to better identify sections requiring straightening. The contrasting flat background will help accentuate any imperfections in the pipe.
- Mark the affected areas: Once you have identified the sections that need straightening, use a marker or a strip of tape to clearly mark the beginning and end of the affected areas. This will make it easier to know where to apply the straightening techniques in the subsequent steps.
- Double-check the entire pipe: After marking the initial areas, give the full length of the pipe a second look to ensure that no additional sections require straightening. Mark any additional trouble spots that were missed in the first pass.
- Plan your straightening approach: Before proceeding with the straightening process, take note of the severity and types of bends or imperfections in the pipe. This will help you determine whether using a heat source or a PEX pipe straightener would be the most effective method for your specific situation.
By following these steps and marking the sections of the PEX pipe that need straightening, you will be better prepared to achieve a straight and properly functioning pipe during installation.
Straightening methods
Using a heat source
Heating the pipe evenly
When using heat to straighten PEX pipe, it is crucial to heat the marked sections evenly to achieve the best results. Follow these steps to aid in even heating:
- Put on heat resistant gloves and protective eyewear to ensure your safety during the process. Secure the PEX pipe in place, making sure it is stable and easy to handle while heating.
- Turn on your heat source, such as a heat gun or torch, and adjust it to a medium heat setting. Keep in mind that using too high a temperature could damage the PEX pipe, while too low a setting may not provide sufficient heat to straighten the pipe effectively.
- Hold the heat source at a safe distance from the pipe, approximately 6 to 8 inches away, to prevent overheating the pipe material. Begin heating the pipe at one end of the marked section, slowly and methodically moving back and forth along the length of the section. Make sure to avoid concentrating heat in one area, as this could cause the pipe to warp or burn.
- Continuously rotate the pipe as you heat it, ensuring that all sides receive equal exposure to heat. This helps the PEX pipe maintain its integrity and ensures uniform straightening throughout the pipe section.
- Monitor the pipe’s temperature and softening as you apply heat. PEX pipe should become more pliable as it heats up. Once the pipe has softened adequately and is flexible enough to straighten without resistance, you can proceed to the next step of applying gentle pulling force.
Remember, patience is key when heating PEX pipe evenly. Take your time and keep an eye on the pipe’s condition to achieve success in straightening the pipe without causing damage.
Applying gentle pulling force
When using a heat source to straighten PEX pipe, it’s important to apply gentle pulling force during the process. This helps prevent damage to the pipe and ensures an even straightening that maintains its structural integrity. Here’s how to use a gentle pulling force while straightening PEX pipe with a heat source:
- Once the PEX pipe is heated evenly and becomes soft, carefully grasp the pipe with heat resistant gloves on both sides of the section that needs straightening. Be cautious not to touch the heated section directly to avoid burns.
- Begin to apply a gentle pulling force by pulling both sides of the pipe away from the heated, softened section. Make sure to pull evenly, maintaining consistent pressure on both sides. This will allow the pipe to straighten without causing stress or deformation in the material.
- During the pulling process, keep a close eye on the heated section of the pipe to ensure it’s not being stretched or twisted. If any distortion is noticed, reduce the pulling force and correct the alignment of the pipe.
- Continue to apply the gentle pulling force until the pipe appears straight. Maintain the pulling force as the heated section cools down, which should take just a few minutes. As the pipe cools, it will harden and maintain its new straightened shape.
- Periodically check the straightness of the pipe as it cools to ensure uniformity along the entire length of the straightened section. If needed, make minor adjustments by gently pulling or pushing the pipe where required.
- Once the pipe is completely cooled, release the pulling force and inspect the straightened section to ensure it meets the desired level of straightness.
By applying a gentle and even pulling force during the straightening process, you can effectively straighten PEX pipe while maintaining its durability and functionality. Always take your time and work with care to achieve optimal results.
Checking for straightness as the pipe cools
As the PEX pipe is cooling down, it’s essential to periodically check for the desired level of straightness. Keep in mind that you’ll have a limited amount of time to make adjustments during the cooling process, so monitor the pipe closely. If you find any areas that still appear bent or curved, apply gentle force in the required direction to correct the shape. Ensure you handle the pipe carefully by using heat-resistant gloves to protect your hands from the residual heat.
To check for straightness visually, you can lay the pipe on a flat, level surface, such as a workbench or a clean floor, and carefully inspect it from different angles. Another effective method is to hold one end of the pipe at your eye level and look through its entire length, making sure there are no obvious bends or curves.
If you notice that the PEX pipe is not as straight as desired, consider reheating the area in question and going through the straightening process again. However, be cautious not to overheat the pipe as this may compromise its integrity and overall durability.
Once the PEX pipe is thoroughly cooled and has achieved the desired level of straightness, you can proceed with your installation project. By ensuring the pipe is straight, you’ll be able to elevate the quality of your work and achieve a more efficient and professional result. Remember to be patient and attentive throughout this process, as the success of your project depends on proper pipe installation.
Using a PEX pipe straightener or pipe press
Inserting the pipe into the straightener
To straighten PEX pipe using a PEX pipe straightener or pipe press, the first step is to insert the pipe into the straightener correctly. Before insertion, ensure that the PEX pipe straightener or pipe press is on a stable, flat surface with ample room to work. This allows for easy maneuvering and reduces the risk of accidental damage or injury.
Start by opening the straightener, usually by pulling the handles apart, to create sufficient space for the pipe. Next, carefully position the PEX pipe within the designated groove or channel in the straightener, ensuring that the marked section of the pipe requiring straightening is aligned with the device’s pressure point.
Gently close the straightener around the pipe, making sure not to apply too much pressure initially. This will prevent any accidental damage to the pipe, as PEX pipes can be damaged if over-stressed during the straightening process. As you become more familiar with the process and the strength of the pipe, you can adjust the pressure accordingly.
Applying pressure to straighten the pipe
Once you have inserted the PEX pipe into the straightener or pipe press, it’s time to apply pressure to achieve the desired straightness. Many PEX pipe straighteners come with adjustable pressure settings, allowing you to apply the right amount of force based on the pipe’s diameter and resilience to straightening.
Begin by applying gentle, even pressure to the pipe. You may need to use both hands to ensure you’re applying balanced force. Keep an eye on the pipe as you work to ensure it remains aligned within the straightener or press. Regularly inspect the straightness throughout the process to determine whether the pipe has reached the desired level of straightness.
It’s important to apply pressure slowly and consistently, rather than trying to force the pipe to straighten all at once. Applying too much pressure too quickly can damage the pipe, potentially causing cracks or splits that will weaken it and make it unsuitable for your project.
If you are using a manual pipe press, you will typically find a lever or handle that helps you to apply consistent pressure on the pipe as you straighten it. For an automatic PEX pipe straightener, you might need to monitor the amount of pressure applied by the machine and make adjustments accordingly.
After you have applied the necessary pressure and achieved the desired straightness, ensure that you carefully remove the pipe from the straightener or press to avoid causing any damage or kinks. It is also a good idea to double-check the straightness of the pipe after removal to confirm it has remained in the desired shape.
When using a PEX pipe straightener or pipe press, remember that practice makes perfect. As you gain experience using these tools, you’ll become more confident in applying the appropriate amount of pressure and achieve a straighter pipe more efficiently.
Checking for straightness
When using a PEX pipe straightener or pipe press to straighten the pipe, it is essential to carefully check for straightness along the entire length of the pipe. This step ensures that the pipe is appropriately installed, preventing any leaks or malfunctions in your plumbing system.
To check for straightness, follow these steps:
- After applying pressure using the PEX pipe straightener or pipe press, carefully remove the pipe from the tool. The pipe should have improved in its straightness throughout the sections where pressure was applied.
- Hold the pipe up at eye level and visually inspect it for any curvature or bends. Check the previously marked sections to ensure they have been adequately straightened. If you notice a slight bend or imperfection, you can return the pipe to the straightener and apply additional pressure.
- Lay the PEX pipe flat on a level surface, like a table or the floor. Observe the pipe from different angles to ensure it lies flat without any pronounced warping. This step can help you spot any smaller, less visible bends that may have been missed during the initial visual inspection.
- If you’re installing the PEX pipe between two fittings, you can perform a test-fit by connecting the pipe to the fittings. This connection will help determine if the length and straightness of the pipe are adequate for its intended use. Make any necessary adjustments if the pipe isn’t aligning correctly or is misshapen.
Remember that patience and practice are vital when straightening PEX pipes using a pipe straightener or pipe press. Take the time to thoroughly check the straightness of the pipe and make any necessary adjustments to ensure a successful installation.
Tips for straightening PEX pipe successfully
Ensuring proper ventilation when using a heat source
Proper ventilation is crucial when straightening PEX pipes to ensure safety and achieve the best results. When using a heat source such as a heat gun or torch, the melting plastic can produce fumes that can be harmful if inhaled in a poorly ventilated space. Following these steps will help to ensure proper ventilation during the straightening process.
- Choose a well-ventilated area: Work in a space with open windows, doors, or other sources of fresh air. Outdoor spaces or well-ventilated workshops are ideal settings for this task.
- Use a fan or extraction system: If available, use a fan or an extraction system to help circulate the air and remove any harmful fumes produced during the heating process. Ensure the fan or extractor is placed correctly to direct the fumes away from the working area.
- Keep a safe distance from the heat source: When heating the PEX pipe, maintain a safe distance from the direct heat to minimize the exposure to any emitted fumes. The use of heat-resistant gloves and protective eyewear can also help to minimize the contact with the heat source and fumes.
- Take regular breaks: Give yourself periodic breaks to step away from the heat source and allow fresh air to enter the workspace. This helps to minimize continuous exposure to any fumes.
- Be mindful of warning signs: Be aware of any signs of dizziness, headache, or respiratory issues while working with a heat source. If you experience any of these symptoms, stop working immediately, leave the area, and seek fresh air. If symptoms persist, seek medical attention.
By ensuring proper ventilation when using a heat source to straighten PEX pipes, you will minimize any health risks and increase the efficiency and quality of your work. Always prioritize safety and follow these guidelines to achieve successful results.
Being patient when using heat to straighten the pipe
Patience is a critical factor when using heat to straighten PEX pipe. Since PEX is a thermoplastic material, it’s essential to allow the heat to soften the pipe gradually before attempting to straighten it. Applying excessive force before the pipe has reached the optimal temperature for straightening can result in permanent damage, such as kinking or cracking.
To ensure the success of the straightening process, give the heat enough time to penetrate and evenly distribute throughout the pipe. As you apply gentle heat, you’ll notice that the pipe becomes more pliable and easier to manipulate. Carefully monitor the temperature changes in the pipe and adjust the heat source accordingly to avoid overheating or burning the material.
When you’re heating the pipe, it may be tempting to rush the process in order to straighten it quickly. However, this haste can lead to undesirable results and potential damage to the pipe. Always remember that the key to successfully straightening PEX pipe is gradually applying the heat and allowing the pipe to respond without applying undue force.
Keep in mind that depending on the size and thickness of the PEX pipe, it may take a few minutes for the heat to soften the pipe adequately. Practice patience and consistently monitor the pipe for any changes in its flexibility, bearing in mind that it’s always better to approach the process cautiously rather than aggressively.
By exercising patience, you’ll give yourself the best possible chances of a successful PEX pipe straightening project and preserving the integrity of the pipe. This ensures a proper fit for installation and reduces the likelihood of issues arising from improper handling or forced straightening.
Avoiding overheating or burning the pipe
When straightening PEX pipe using a heat source, it is crucial to prevent overheating or burning the pipe during the process. Overheating can cause the pipe to become weak, potentially causing leaks or other issues once the pipe is installed. Furthermore, burning the pipe will render it unusable, creating a need for replacement. To avoid these issues, follow these tips:
- Maintain a Safe Distance: Keep the heat source at a suitable distance from the pipe. You want the heat to be evenly distributed over the pipe section that needs straightening, but not too close to cause burns or damage. As a general rule, maintain a distance of at least 6 inches between the heat source and the pipe.
- Keep the Heat Moving: Instead of focusing the heat on one area of the pipe, move the heat source back and forth along the section that requires straightening. This will help to distribute the heat evenly and minimize the risk of overheating or burning the pipe.
- Adjust the Heat Level: If you are using a heat gun or torch with adjustable heat settings, start with the lowest heat setting necessary to gradually soften the PEX pipe. Increased heat can always be added if more is required for straightening, but it is harder to correct the damage caused by heat that is too high.
- Monitor the Pipe’s Color: Pay close attention to the color of the PEX pipe as you heat it. If the pipe begins to discolor, it may be an indication that the pipe is close to overheating. Discoloration can be an early sign of damage, so heating should be stopped or reduced at the first signs of color change to avoid further harm.
- Test the Pipe’s Flexibility: As you apply heat to the PEX pipe, gently test the flexibility of the section being heated. Once the pipe becomes more manageable and easier to manipulate, reduce or turn off the heat source to avoid overheating or burning.
By following these guidelines, you can successfully straighten your PEX pipe while minimizing the risk of potential damage due to overheating or burning. Proper technique and vigilance will result in a correctly shaped PEX pipe ready for installation, ensuring a reliable and efficient plumbing system.
Ensuring the pipe is fully cooled before handling
It is essential to ensure that the PEX pipe has completely cooled before handling it, especially after using a heat source to straighten it. Handling the pipe prematurely can not only cause potential burns and injuries but also compromise the straightening process, leading to an imperfectly straightened pipe.
To determine if the pipe is cool enough to handle, allow it to rest on a heat-resistant surface for a few minutes after straightening. Touch the surface of the pipe gently with heat-resistant gloves to avoid any potential injury. If the pipe feels too hot, give it more time to cool down. Bear in mind that a pipe can feel cool on the outside but still retain heat internally. Thus, waiting an additional few minutes after the exterior feels cool to the touch is a good practice.
Apart from protecting yourself from burns, allowing the pipe to cool entirely ensures that PEX material has regained its original shape and rigidity, necessary for a successful installation. Handling the pipe prematurely can cause it to bend or kink while aligning or connecting it to fittings, leading to improper connections and the risk of leaks.
Patience is vital when straightening PEX pipes. Ensuring that the pipe has fully cooled before handling prevents potential injuries and guarantees a successful installation by minimizing the chance of unwanted bends and kinks in the process.
Possible challenges and how to address them
Inadequate heat applied
Inadequate heat applied to the PEX pipe during the straightening process can lead to unsatisfactory results or even damage the pipe. Knowing the correct amount of heat to apply and how to recognize when the pipe is prepared for straightening is essential. Follow these steps to address challenges related to inadequate heat application:
- Choose the right heat source: It is crucial to use an appropriate heat source, such as a heat gun or propane torch, suitable for the specific type of PEX pipe you are working with. Always follow the manufacturer’s recommendations when selecting and using a heat source for PEX pipes.
- Maintain proper distance: When using a heat source, it is important to maintain a safe and optimal distance between the PEX pipe and the tool to ensure even heating. A distance of 6-8 inches is often recommended, but it is always best to follow the guidelines provided by the pipe and heat source manufacturers.
- Warm-up time: Allow the heat source to warm up for about a minute before applying heat to the PEX pipe. This ensures that the heat source reaches the optimal temperature required for successful pipe straightening.
- Heat the pipe uniformly: In order to apply adequate heat, it is necessary to heat the entire section of the pipe that needs to be straightened. Move the heat source back and forth along the section being straightened, making sure to heat evenly all around the pipe. Pay close attention to not overheat any spot, as it may damage the pipe.
- Test the flexibility: As you heat the PEX pipe, occasionally test its flexibility by gently bending it. When the pipe turns flexible enough to be straightened without resistance or bouncing back to its original shape, you can proceed with the straightening process.
- Understand the limitations: It is important to remember that PEX pipes have certain limitations, and not all kinks or severe bends may be completely straightened. If a section of the pipe remains bent even after adequate heating, it may be necessary to replace that section.
By following these tips and maintaining proper safety precautions, you should be able to overcome the challenges associated with inadequate heat application, giving you a straight and well-installed PEX pipe.
Pipe’s resilience to straightening
While PEX pipes are known for their flexibility and durability, this quality may also make it seemingly difficult to straighten them out. The pipe’s natural resilience might cause it to return to its original curved shape after an attempt to straighten it. However, with the right techniques and persistence, you can overcome this challenge.
It is crucial to apply constant and even pressure when attempting to straighten the pipe. One way to do this is by using a PEX pipe straightener or a pipe press, which ensures consistent pressure along the entire length of the pipe that needs to be straightened. When using a straightener, make sure to move the tool along the pipe gradually and consistently, so as not to create kinks or irregular bends in the process.
Additionally, you can combine this mechanical approach with the use of heat. A heat gun or a torch can help soften the pipe, making it more susceptible to the straightening process. Ensure that you apply heat evenly along the entire length of the pipe and avoid overheating as it may damage the material. Gradually heat the pipe while applying gentle pulling force to encourage the pipe to straighten. Certain PEX pipe straighteners may also have built-in heating capabilities for this purpose.
If the pipe still maintains some curvature after being worked on, don’t be discouraged. Repeat the methods mentioned above, paying attention to any sections of the pipe that exhibit more resistance to straightening. The key is to be patient and persistent, as the pipe may require multiple attempts to achieve the desired level of straightness.
Take the time to inspect the pipe for any signs of damage after straightening, especially if you use heat in the process. Ensure there are no visible scorch marks, melting, or kinks that could compromise the pipe’s performance. If you notice any of these signs, it is best to replace the damaged section to ensure a safe and efficient installation.
Achieving straightness in tight bends
Achieving straightness in tight bends can be one of the more challenging aspects of working with PEX pipe, especially for individuals new to the process. Tight bends may take more effort to straighten, and there’s a higher probability of kinking or damaging the pipe if it’s not done correctly. However, there are some practical ways to address this challenge and achieve excellent results:
- Heat Application: Ensure that sufficient and even heat is applied to the tight bend of the pipe, focusing on the outer curved area. This is where most of the stretching will occur, and the right amount of heat allows the material to become more pliable, leading to a more successful straightening process.
- Gradual Straightening: While it’s important to apply heat to the tight bend, keep in mind that heat alone won’t straighten the pipe. Gradually start pulling the pipe in opposite directions to straighten it. Rushing the process or putting substantial force might damage the pipe or create kinks, leading to leaks or other issues in the future.
- Bend Supports: When working with tight bends, consider using bend supports, which help maintain the bend radius and reduce the risk of kinking. These tools assist in the straightening process for tighter bends by applying even pressure to the bend, providing a more uniform and successful result.
- Multiple Attempts: If the tight bend is not sufficiently straightened in the first attempt, avoid pushing the pipe beyond its limit, as it may weaken the material, leading to future failure. Instead, let the pipe cool, reassess the situation, and repeat the process as needed until the desired straightness is achieved. Patience is key in this process.
- Controlling the Rebound Effect: PEX pipes are known for their ability to bounce back into their original shape. After successfully straightening a tight bend, the pipe may still exhibit a slight curve due to this rebound effect. As a solution, slightly overcorrect the straightening process, keeping in mind the possible rebound, and maintain the desired straightness effectively.
By following these steps and being patient throughout the process, you can successfully straighten tight bends in PEX piping, ensuring a reliable and durable installation.
Repetition for achieving best results
One of the challenges you may face when straightening PEX pipe is that the pipe may not straighten completely on the first attempt. This is especially true for pipes with tighter bends or those that have been in a coiled state for an extended period. It is essential to understand that repetition might be necessary to achieve the desired level of straightness, and patience is key during this process.
To address this challenge, follow the straightening process for multiple iterations, allowing the pipe to cool and reset in between each attempt. This will help the pipe gradually conform to the desired shape while preventing any potential damage or overstretching. Remember to maintain a consistent heat source throughout each pass and avoid overheating the pipe.
Here’s a helpful technique for repetitions: Divide the pipe section that needs straightening into smaller segments. Work on each segment individually, starting at one end and progressing towards the other. This method ensures consistent heating and straightening of the pipe and allows you to easily assess your progress.
As you get more comfortable and familiar with the PEX pipe straightening process, you’ll be able to gauge how many repetitions may be necessary for achieving the best results. It is always best to err on the side of caution, giving yourself ample time to achieve straightness without causing damage or compromising the pipe’s integrity.
Anticipate the need for repetition when straightening PEX pipe and be patient during the process. By allowing the pipe to cool between attempts and working in smaller sections, you’ll maximize the likelihood of straightening the pipe successfully without damage.
Conclusion
Importance of straightening PEX pipe
Straightening PEX pipe plays a crucial role in ensuring a successful installation process. Properly aligned pipes not only result in a more professional appearance but also contribute to the efficient functioning of the plumbing system. By following the techniques and tips mentioned in this article, users can ensure their PEX pipe straightening endeavors yield the best possible results, ultimately leading to a long-lasting and efficient plumbing solution. It is important to be patient and practice the methods discussed to achieve optimal straightness and enhance the overall performance of PEX piping within residential or commercial applications.
Practice the methods discussed
In closing, mastering the technique of straightening PEX pipe is essential for any do-it-yourself enthusiast or professional plumber looking to install a reliable and efficient plumbing system. Achieving a successful installation doesn’t happen overnight; therefore, patience and practice are vital when learning the proper methods.
As you gradually become more proficient in straightening PEX pipe, you’ll find that the process is simplified, allowing you to take full advantage of using this amazing material in your home or office plumbing projects. Whether you choose to use a heat source, a PEX pipe straightener or a combination of both, always remember to follow safety precautions and work in a well-ventilated area.
Keep experimenting with the techniques discussed in this article and remain persistent in your quest to become an adept PEX pipe straightener. With practice and determination, you are sure to master this valuable skill and take your plumbing endeavors to new heights, leading to more efficient and cost-effective installations.