When you see the term micro soldering you probably think about soldering very small things like electronic components such as integrated circuits, processors, transistors, etc.
Well, you would be correct, that is exactly what micro soldering is!
How Small Can we Make It?
The quest to make electronics smaller and smaller means we need to make the components they are made from smaller and smaller.
It would be one thing to only make devices smaller, but at the same time technology companies have been able to greatly increase the performance and features of these devices while also making them much more compact.
As you can imagine, smaller devices with smaller components mean smaller connections that need to be soldered using micro soldering tools and techniques.
Look at How Far We Have Come
Just to give some perspective on how far things have come in regards of how many transistors can be packed into an area let’s take a look at some processors over the years.
Let’s Start with the 1980s
While the first processor we are going to mention is not the oldest, it was used in many of the most iconic devices of the 1980s.
These devices include the Apple II computers, Atari 2600 game console, Nintendo Entertainment System, the Commodore 64 computer, and many more.
In fact, a version of this processor is still manufactured and used in devices today.
The original 6502 processor had around 3,500 total transistors in a space of 21mm square.
The entire package only had 40 external pins available to connect to other electronic components.
The type of components used in these devices would not require micro soldering.
Twenty Years Later
Fast forward around 20 years to the mid-2000s, and the Intel Pentium 4 PC processor has around 184,000,000 total transistors in a space of 90mm square.
If we do some calculations to see what the transistor count per area is we get around 167 transistors per mm for the 6502.
This seems pretty impressive, and it certainly was for the time.
Now let’s do the same calculations for the mid-2000s Pentium 4 to see how much technology has progressed in around 20 years.
Since the Pentium 4 packs 184,000,000 transistors in a 90mm square area, if we do the same calculation we did for the 6502 we get a little over 2,000,000 transistors per sqaure mm.
That’s a almost a 1,200,000% increase in transistors per square mm, and that was almost 20 years ago!
More and Smaller Connections
The Pentium 4 also had a lot more external pins at 775 compared to the 6502’s 40 pins.
While the total package size is larger on the Pentium 4, the percentage increase in the number of pins is way more.
Of course, with a lot more pins per square mm those pins must be smaller to fit into the space.
These types of devices where there are more and smaller external connectors is where we get into using micro soldering techniques.
Another 20 Years of Progress
Fast forward almost another 20 years to the year this is being written (2021), and Apple recently released its M1 processor.
The Apple M1 has a mind blowing 16,000,000,000 transistors in a space of 119 square mm.
If we calculate the M1’s transistor density then we come up with over 134,000,000 transistors per square mm.
That’s around a 6,700% increase in transistor density from the Pentium 4 almost 20 years ago.
That’s still a pretty amazing rate of packing more transistors into a processor.
If we compare the Apple M1 to the 6502 then that is around a 457,000,000% increase in the processor’s transistor density!
It’s not Just Processors
Just as the transistors inside of processors have become much smaller, the same goes for the other external supporting components have also been reduced in size.
For example, in the 1980s if you opened up an original Nintendo Entertainment System you will see a circuit board like the one below.
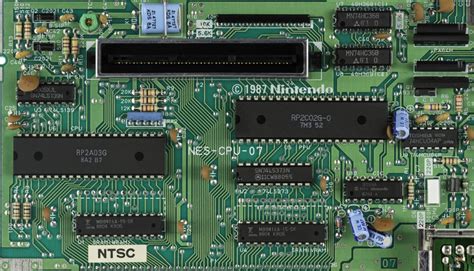
As you can see, the components and their connections on this board are not too small and would not require micro soldering techniques to work with them.
You could purchase a low cost soldering kit for less than $20, and use it to replace any of the components on this board.
Since we used a gaming console as an example, let’s take a look at another gaming console and see how different it is from the original NES.
The original Micosoft Xbox console came out 20 years after the original NES.
Below is one of the original Xbox mainboards.
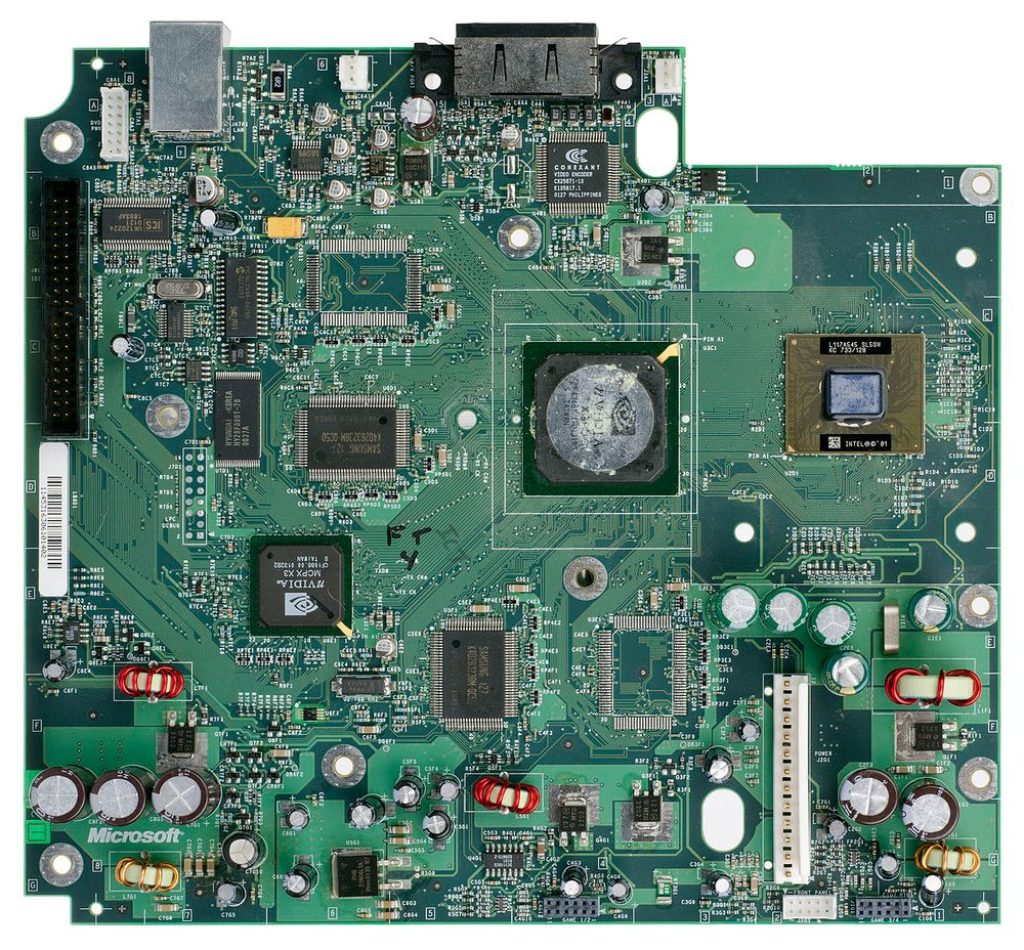
As you can see, the Xbox has lots of much smaller components with much smaller connections compared to the original NES board.
Now let’s take a look at a modern smartphone.
Below is the mainboard from a modern smartphone.
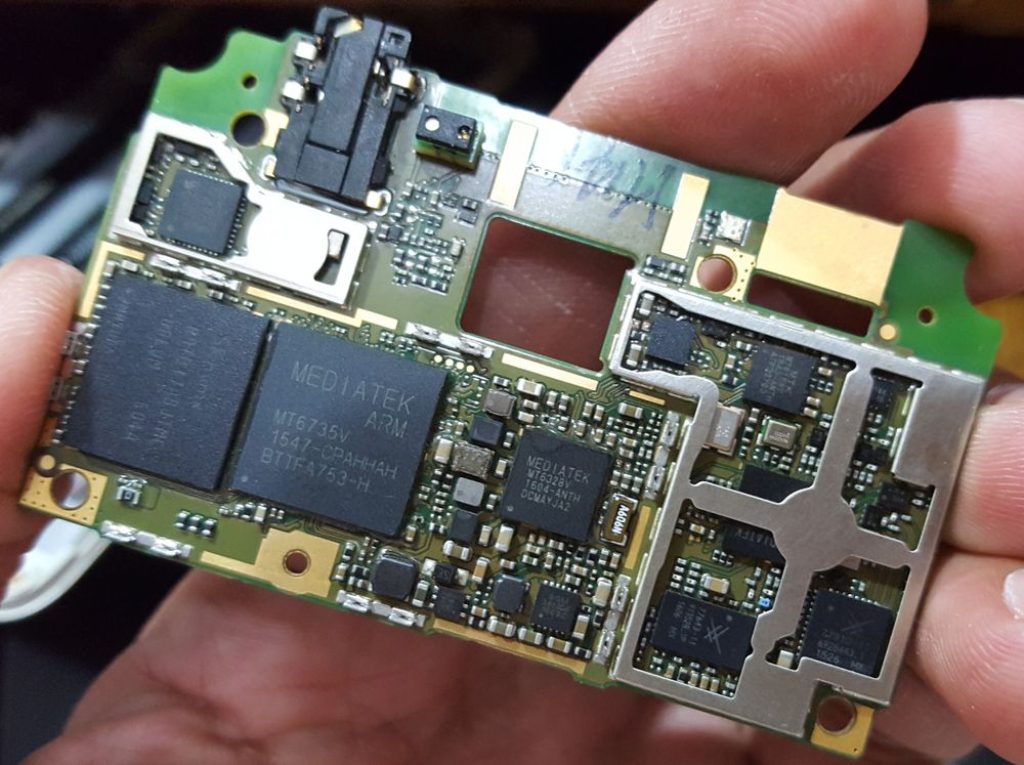
As you can see, modern smartphones push their components to even smaller sizes.
Working on something like this would require special tools for micro soldering.
Component Mounting
One of the things that needed to change when making more and more complex integrated circuits is the way they are mounted.
Older circuit board primarily used a mounting technique called through hole mounting.
Newer circuit boards primarily use a technique called surface mounting.
Through Hole Mounting
If you look at the original NES board you will notice most of the components are what is called through hole mounted.
Through hole mounted components have connectors that are inserted into holes in the board.
These holes go all the way through the board, and then the component connectors are soldered on the opposite side from were the component is.
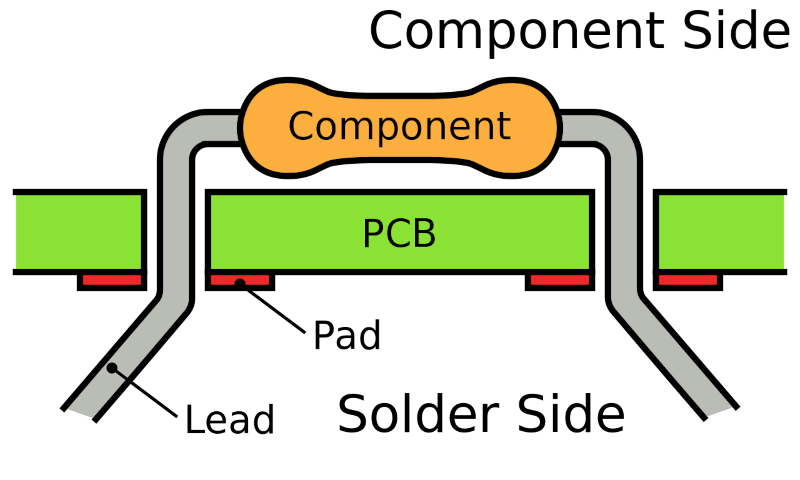
Surface Mounting
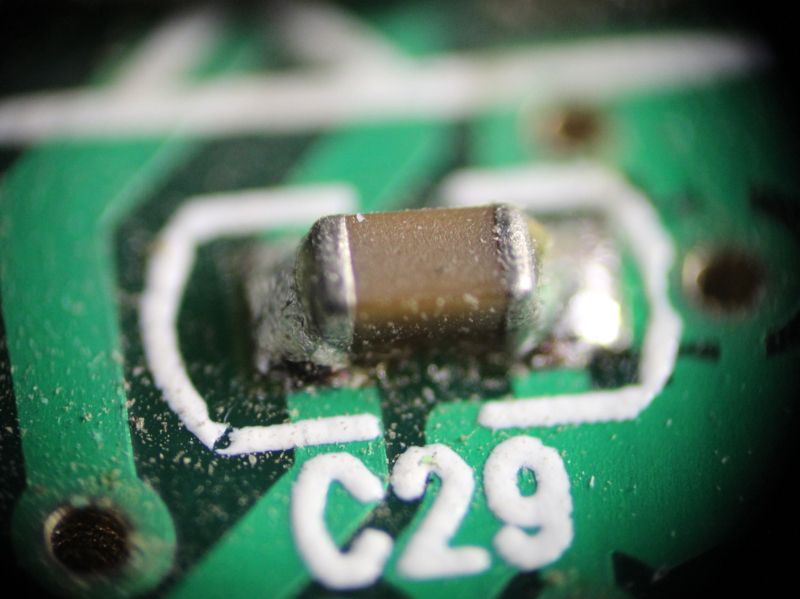
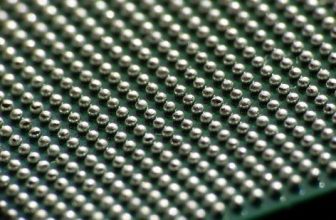
As components have gotten smaller their connectors have also had to get smaller.
More modern electronics have mostly surface mount components.
This is the type of components you see on the original Xbox mainboard.
Surface mount component’s connectors do not go through the circuit board.
They are actually soldered to the same side of the board where the component is.
This allows more connectors to be packed into a smaller space, which is something that is required to pack more components into smaller and smaller spaces.
When people talk about micro soldering they are almost always talking about surface mount components.
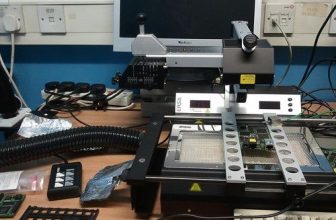
Special Tools
As you can imagine, the newer and smaller surface mounted components require different skills and special tools to work with effectively.
Let’s go through some of the special tools that are used when micro soldering.
Hot Air Guns
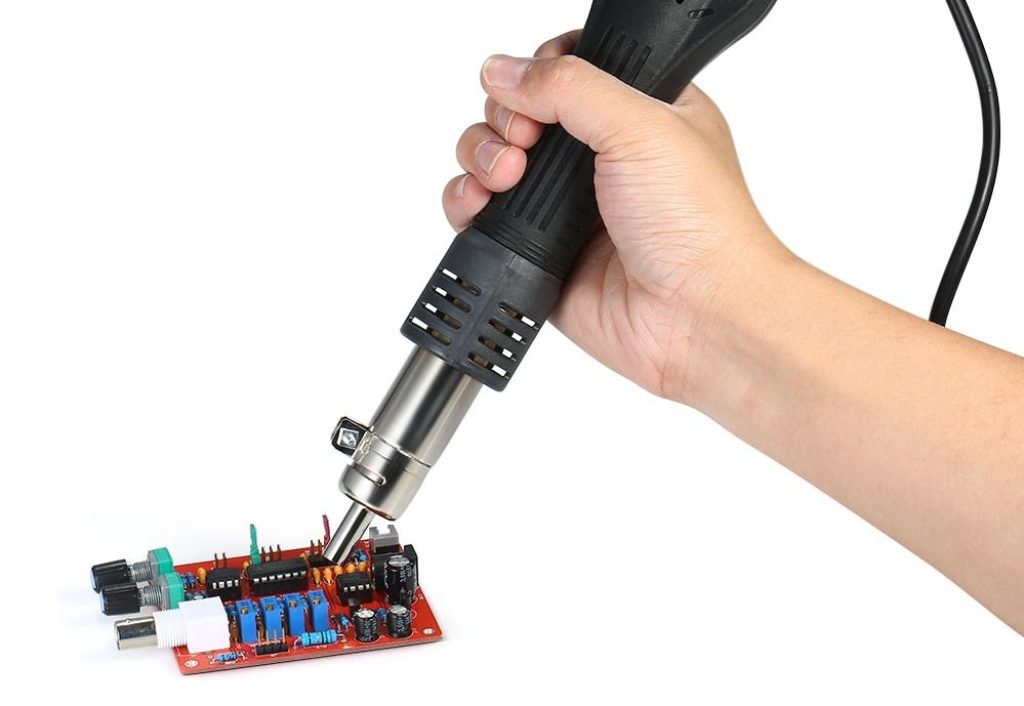
When working with older style through hole components and even some large surface mount ones a normal pencil type soldering iron works fine.
Once the surface mount components start getting smaller you will need to hot air gun.
A hot air gun is basically what it sounds like.
You can think of it as a miniature hair dryer that blows out very hot air, air hot enough to melt solder.
A hot air gun allows you to heat an entire surface mount component at one time.
This makes it much easier to remove and micro solder these types of components.
Tweezers
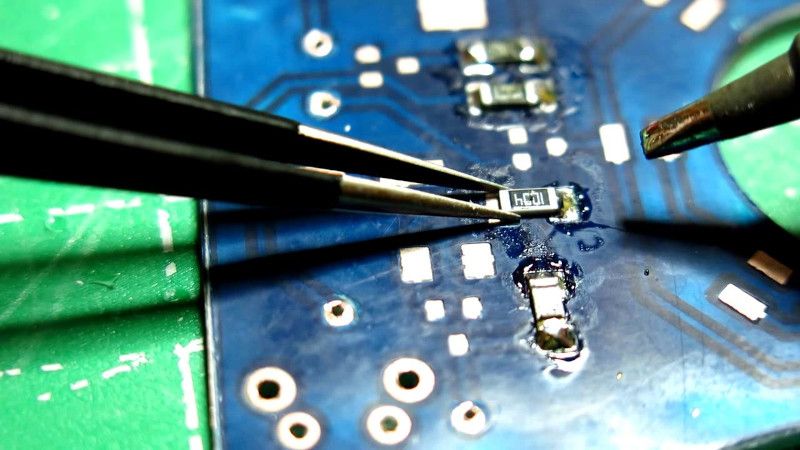
Tweezers are also a must when working on surface mount components.
There are two main reasons for this.
The first is maybe the more obvious reason, the small components are hard to position with only your fingers.
The second reason is the components get very hot when using the hot air gun!
You literally can’t touch them with bare hands without getting burned when they are heated to a temperature where you will be able to work with the melted solder.
Magnifying Glasses
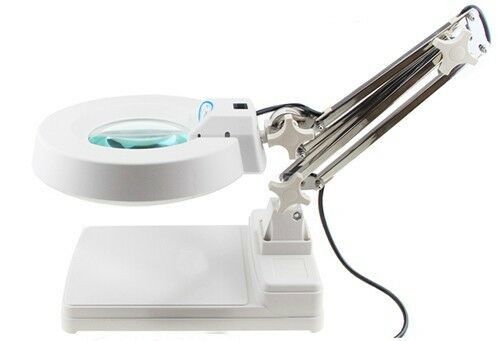
Because the components are small, and you need to be able to see them clearly, you will likely need some kind of magnifier.
There are several options for these.
There are types of magnifiers that attach to your head just like a pair of glasses.
Other ones are attached to arms to can mount to your desk or workbench.
These have a spring loaded arm that allows you to move it around easily, and they have an integrated light many times.
Microscopes
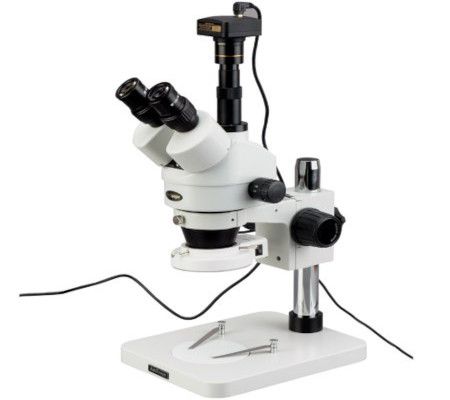
When working with very small components a magnifying glass will not be sufficient once you reach a certain size threshold as components get smaller and smaller.
Once that threshold is reached you will need a microscope to work with components that size and smaller.
Like the magnifying glasses mentioned above a microscope will have an integrated light many times.
Conclusion
Now you can see what micro soldering is and why it is needed when working with modern electronic components.
The special tools required for micro soldering can be expensive, and in some cases you can do some repairs without buying these special tools.
But if you need to do micro soldering on a regular basis then these special tools will be a must for you.