Sanding concrete is a process by which the surface of a concrete material is smoothened and prepared for further finishing such as painting, staining, or sealing. This is usually done for concrete floors, countertops, patios, and other surfaces. The aim is to remove any irregularities and imperfections on the surface of the concrete, especially after a fresh pour or over time after exposure to wear and tear.
This process can involve the use of different tools and equipment, but the most important aspect is that the sanding must be performed evenly across the whole surface, which requires precision and patience. If done correctly, sanding can enhance the aesthetic appearance of the surface, provide a smoother texture, and prepare the concrete for any subsequent treatments or finishes. Now let’s explore more about the importance of using the right tools for sanding concrete.
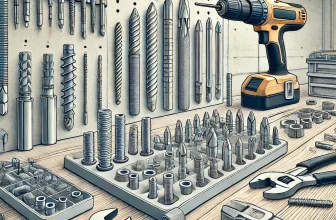
Importance of a proper sanding tool
Having the right tool plays a crucial role in achieving an effective and efficient sanding process. With a proper sanding tool like an orbital sander, you can save time, manage dust efficiently, and reduce physical exertion compared to manual sanding. Moreover, it helps in achieving a smooth, clean, uniform, and aesthetically pleasing finish. Using substandard or inappropriate sanding tools may lead to uneven surfaces, require more effort, and take longer to complete the task. Therefore, for a seamless, professional-grade finish, a quality sanding tool like the orbital sander is indispensable.
Understanding Orbital Sander
Definition and function of Orbital Sander
An orbital sander is a handy power tool that utilizes a specific motion to sand surfaces. This motion is somewhat elliptical, or ‘orbital’, hence the name. The orbital motion of the sander ensures that no single portion of the abrasive material (often sandpaper) travels the same path twice during any given pass of the tool. Because of this unique action, an Orbital Sander minimises the risk of leaving noticeable marks and scratches on the surface, providing a more uniform finish compared to other sanding tools.
Orbital Sanders are versatile and can be used on a variety of surfaces such as wood, plastic, and metal. In the context of this article, we’re focusing on an often overlooked application: sanding concrete. This tool is incredibly functional in tackling tough concrete surfaces, smoothing them out and preparing them for further finishing or treatment. The orbital sander simplifies the typically challenging task of smoothening rough and uneven concrete surfaces into a manageable, efficient, and clean process.
Variations of Orbital Sanders and their key characteristics
Orbital Sanders come in different variations, each with their unique characteristics ideal for different applications.
The first type is the basic Orbital Finishing Sander. Light in weight and small in size, this type is the perfect fit for ultra-smooth wood sanding, rounding over sharp edges, and knocking down dried coats of paint or varnish. Its square shape allows it to reach corners and edges easily, making it your go-to for light sanding work.
The second type is the Random Orbit Sander. Combining the speed and aggressiveness of a belt sander with the capability to produce a fine finish like the Orbital Finishing Sander, this tool is an all-rounder. Its unique random orbit action not only spins the sanding disk but also moves it in an ellipse, ensuring no repetitive patterns are left on the material. Best suited for moderate to heavy sanding, this tool quickly removes material while still providing a smooth finish.
The third and most powerful is the Rotary Orbital Sander. Known for its circular sanding disc that rotates and vibrates in tiny circles, it is most suitable for heavy-duty work. This tool can efficiently remove large amounts of material including concrete, making it a solid option for a wide range of jobs.
Despite their differences, all Orbital Sanders have some common key characteristics. They all use sandpaper disks, employ a random-orbit or rotary action for sanding, and the majority have built-in dust collection features. For detailed work, deciding on the right tool depends on the nature of the job and the material you’re working with.
Benefits of Sanding Concrete with an Orbital Sander
Efficiency of the process
Using an orbital sander to sand concrete greatly improves the efficiency of the entire process. The primary reason is the powerful motor that makes quick work of any rough concrete surfaces. A task that might take hours of intense manual labor can be accomplished in a fraction of the time with an orbital sander.
Moreover, orbital sanders are designed for easy handling. They have a user-friendly configuration that takes the stress off the operator’s hand and arm muscles during prolonged usage. This ensures you can work for longer periods without fatigue, hence, more work gets done in a lesser time.
Also, given their automated nature, orbital sanders provide consistent performance. This eliminates the variable of human error or fluctuating effort that can slow down the sanding process. Consequently, an orbital sander helps maintain a steady work pace, keeping your project timeline on track.
Therefore, when it comes to the matter of efficiency in the context of sanding concrete, orbital sanders prove to be a worthy investment, significantly enhancing speed, ease of operation, and consistency.
Cleanliness and dust reduction
One of the significant advantages of using an orbital sander for sanding concrete is the cleanliness of the process and the considerable reduction of dust. Unlike some other methods, orbital sanders typically come with a built-in dust collection system. That means as you sand the concrete surface, the majority of the dust created is immediately collected, preventing it from spreading all over your workspace.
The duct attached to the sander sucks in the dust into a collection bag or box, which you can conveniently empty out once full or after the process. This feature not only keeps your workspace cleaner but also greatly contributes to your health and safety, as inhaling concrete dust can lead to severe health issues.
By kicking dust out of the equation, orbital sanders let you put all your effort and focus into accomplishing a smooth, uniform finish. You will also spend less time on post-sanding cleanup, making the entire process more convenient and efficient. The dust reduction coupled with the tool’s clean performance offers a win-win for both professional contractors and DIY enthusiasts.
Smoothness and uniformity of the final result
One of the primary advantages of using an orbital sander in concrete sanding projects is the uniformity and smoothness of the final result it provides. The design of the orbital sander enhances its motion, allowing it to move in small circles, or ‘orbits’. This orbital motion ensures that the sander does not spend too much time in one place, thus avoiding creating uneven surfaces or dents in the concrete.
The use of different grit sandpapers also helps to achieve a perfectly smooth finish. An abrasive material does not always ensure a smooth surface; however, orbital sanders can take advantage of lower grit numbers to roughen the surface initially, then using higher grit numbers later for finer, more delicate sanding. This versatility allows you to achieve exactly the level of smoothness and uniformity you desire.
Overall, an orbital sander is capable of delivering a smooth, even finish that freehand sanding or less advanced tools may not achieve. Whether the project is big or small, an orbital sander ensures a finish which not only looks aesthetically pleasing but is also smooth to the touch.
Steps for Sanding Concrete with an Orbital Sander
Tools and safety gear needed
Before getting started on your sanding project, it’s imperative that you have the requisite tools and safety gear at hand. Having the right equipment contributes to not just the efficiency and quality of work, but also keeps you safe during the process.
At the top of your checklist should be an orbital sander, an essential tool for this task. These are widely available and come in different types and price ranges. Ensure you select one that best fits your project’s requirements and your level of expertise.
One key component is sandpaper. Your orbital sander will require sanding disks specifically designed for it. You will need to use different types of discs during the process, starting with a coarse one to the finer grits for a smooth finishing touch.
Safety gear is an absolute necessity. Begin with protective eyewear to safeguard your eyes from flying debris. A quality dust mask or respirator is also essential as it prevents you from inhaling dust particles, which can be harmful. Apart from these, also consider getting a pair of sturdy work gloves to protect your hands and ear protection to buffer the noise produced by the sander.
Remember, having the correct tools and protective gear is a critical first step in any DIY project. Take the time to collect and verify all the elements needed before commencing the process of sanding concrete with an orbital sander.
Cleanliness and preparation of the concrete surface
Before even picking up your orbital sander, the first step to any efficient sanding process should be preparing the concrete surface. Preparation is key to achieving the best possible result, as well as preventing potential issues during the sanding process.
Start by inspecting the concrete surface for any visible debris, such as loose stone, flaking paint, or dirt. Accumulated grime can interfere with the uniformity of sanding and potentially damage your orbital sander. After a quick inspection, start sweeping the area thoroughly using a heavy-duty broom to remove all traces of dust and debris.
Next, assess the concrete surface for any unrepaired damage, such as significant cracks or pits. This damage may require filling with a suitable concrete repair mix, following the instructions of the manufacturer. Keep in mind that the repair mix has to fully cure before you start sanding.
Finally, you cannot skip the step of washing the surface. Grease and oil are common contaminants that can lessen the effectiveness of sanding. Use a degreasing detergent combined with pressurized water for stubborn oil or grease-based stains. Allow plenty of time for the surface to dry completely. Remember, a clean and dry concrete surface ensures a smoother sanding process and minimizes potential damage to your orbital sander.
Choosing the right type of sandpaper
Selecting the appropriate type of sandpaper is a vital step when it comes to sanding concrete with an orbital sander. Different sandpapers are designed for diverse materials and finishes. When dealing with concrete, a rough, durable sandpaper is essential to penetrate the tough surface.
Begin with a coarser grit sandpaper, around 24 or 36 grit, for initial rough sanding. This will help wear down any high spots on your concrete floor or wall, preparing it for further sanding stages. Do not apply too much pressure, as it’s the sharpness of the grit that does the job.
After you have taken care of the major bumps and imperfections, it’s time to transition to a moderately gritted sandpaper, around 60 grit. This will help smooth out the scratches from the rough grit.
Lastly, a fine-grit sandpaper, usually between 120 and 220 grit, should provide a polished result. It helps to smoothen the surface even further, getting rid of the scratches made by the medium grit sandpaper.
Remember, a gradual progression from coarse to fine grit leads to the smoothest finish. Skipping a grit could end up leaving deep scratches on your concrete surface that won’t be easy to get rid of.
Thus, while selecting sandpaper, focus on its grit number and abrasiveness, ensuring it caters to the concrete’s toughness without causing undue damage.
The actual sanding process
Starting the Sander
Before you begin the sanding process, you should have your orbital sander securely positioned on the concrete surface. If your sander is equipped with a dust bag, ensure it is firmly attached and clear of any clogs or debris to allow for maximum dust collection.
Now, it’s time to start the sander. Depending on the model, your orbital sander might have a “push-to-start” or a “flick-switch” type button. Regardless of the design, the process usually involves pressing the start button and gradually increasing the speed until you reach the desired level.
If you’re new to sanding, it’s recommended to start the machine at a slower speed to get the feel of its operation. Once you become comfortable, you can incrementally increase the speed. It’s essential to note that you should always start the sander while it’s in contact with the surface that needs to be sanded. Starting it in mid-air then placing it on the concrete can gouge the surface and lead to a less even finish.
As the orbital sander starts, you’ll likely feel it vibrate in your hands. This is perfectly normal and is merely a sign that it’s ready to go to work. The trick is to let the sander do the job without applying too much pressure. With the sander running, you’re now prepared to move onto the next stage of the sanding process.
Applying careful pressure and movement
Applying the appropriate pressure and movement when sanding is essential to achieving a quality finish on your concrete surface. When using the orbital sander, start it up and let it attain full speed before gently applying it to the concrete area you intend to sand.
It’s pivotal that you never press down on the sander. Putting extra pressure on the sander won’t make it work faster or more efficiently—in fact, it might have the opposite effect. The sander works best when its own weight is applying the pressure. Your primary function should be guiding the sander, not pushing it down. Too much downward force can goad the sander into digging into the concrete, potentially damaging both your surface and tool.
Regarding movement, make sure you are moving the sander consistently in a circular or back-and-forth motion, overlapping each pass for an even finish. Maintain a gradual, steady pace and make sure not to linger too long in one spot—it’s an easy mistake that can lead to an uneven, over-sanded surface. Understanding and adjusting the direction and speed of your sweeps according to the grain of the concrete can yield a smoother result.
It’s also recommended to keep the sander level. Tipping it to use just one part of the sandpaper might seem like a good trick, but it generally results in unsightly marks and rapid paper wear. Try to keep the entire base of the sander in contact with the concrete surface as much as possible.
In conclusion, practicing careful pressure and movement control when sanding concrete with an orbital sander can enhance the efficiency of the process, save you precious time, and provide a superior, professional-grade finish.
Checking the progress and final result
After you’ve started the orbital sander and begun carefully smoothing out your concrete surface, it’s crucial to periodically check your progress. This is not only to ensure that the concrete texture is becoming smooth and even, but also to prevent damage caused by over-sanding.
To check your progress, turn off the orbital sander and carefully touch the surface to feel the texture. Ideally, it should feel evenly smooth and free of any coarse or rough areas.
Additionally, visually inspect the concrete. It should appear lighter in color and less glossy, a sign that the old, worn-out surface has been sanded away and a smoother, fresher layer has been revealed. If there are any spots that appear darker or still bear any marks, those are likely places where more sanding is needed.
When checking the final result, something to remember is that perfection isn’t necessary, especially considering that concrete is a naturally porous and uneven material. What you ultimately want to achieve is a surface that’s uniformly smooth to the touch and to the eye.
After sanding is complete, wipe the surface with a touch of water on a sponge to reveal the true color and texture of the surface. Any imperfections will be apparent at this point. If any areas need more work, simply restart your orbital sander and continue the process until you’re satisfied with the result.
Checking your progress and the final result is a crucial part of sanding concrete. It helps maintain the quality of the project, and ensures a result that can be appreciated both aesthetically and practically. The beauty of this DIY task is that you can keep refining until you reach your optimal finish.
Post-sanding cleanup and maintenance for the Orbital Sander
After the sanding process, it’s crucial to clean up and maintain your Orbital Sander to ensure it stays in excellent working condition for future use. Begin by unplugging the sander to prevent any accidental starts. Next, remove the sandpaper or disc from the sander. To do this, peel off the sandpaper from the bottom of the sander if it uses a hook and loop system, or release the clamps on the side if it’s a pressure mounted system.
Once the sandpaper is removed, use a soft brush to gently clean dust and debris from the sander. Focus especially on the pad, the part that directly contacts the concrete, as well as any exhaust vents – these can become clogged over time and reduce your sander’s effectiveness. Compressed air can also be useful for removing stubborn particles.
Regular maintenance of the sander is also important. Periodically check the power cord for any damage, inspect the bottom pad for wear and tear, and ensure all screws and fasteners are tight. Always store your sander in a clean, dry place to prevent any damage or corrosion.
Remember, taking care of your Orbital Sander not only prolongs its lifespan but also ensures your safety and the quality of your workmanship.
Tips and Warnings
Importance of wearing protective gear
Wearing protective gear during any DIY project, especially when sanding concrete with an Orbital Sander, is of the utmost importance. This is largely because sanding can cause dust and debris to kick up, which can lead to potential harm to your eyes, lungs, and even skin without the right precautions.
Start by donning a good pair of safety goggles to shield your eyes from dust and small particles that the sander will inevitably emit. Don’t underestimate the propensity of concrete dust to irritate your eyes or, in the worst case, cause an injury.
Next, invest in a comfortable yet effective dust mask or respirator. This equipment is designed to protect your lungs from the fine concrete dust which can be hazardous if inhaled. It’s worth noting that typical household masks or cloth coverings might not provide the required level of protection against this type of dust.
Additionally, wearing a pair of sturdy, durable work gloves will protect your hands from accidental nicks or scrapes, as well as help you to better grip the orbital sander.
Ear protection, though sometimes overlooked, is recommended as consistent exposure to the sound of the sander can lead to hearing impairment over time.
Last but not least, long-sleeved shirts and long pants can provide an added layer of protection against dust and debris.
Remember, no aesthetic outcome is more important than your health and well-being, so don’t skimp on safety gear. Though it may initially seem cumbersome and bothersome to kit up, adopting to wear appropriate safety gear can save you from unforeseen accidents and costly trips to the hospital.
Understanding the potential health risks and how to mitigate them
Working with an orbital sander on concrete can have some potential health risks, mainly due to the dust it produces. Inhalation of the concrete dust can lead to respiratory issues, including silicosis, a debilitating lung disease caused by the inhalation of crystalline silica. Eye irritation is another common concern as dust particles can fly up and irritate your eyes during the sanding process.
There are, however, ways to mitigate these risks. Firstly, always wear a respirator mask that’s designed to filter out small dust particles. This protects your lungs from the harmful effects of the concrete dust. Make sure that the mask fits well and there’s no gap for the dust to seep in.
Secondly, use goggles to protect your eyes from any dust particles. Go for ones that seal around your eyes for maximum protection. Also, a pair of sturdy gloves will protect your hands from any debris or sharp edges that may be present in the concrete.
Another safety measure one can take is to make use of an orbital sander with a built-in dust collection system. This drastically reduces the amount of dust that would otherwise be released into the environment.
Lastly, it’s crucial to take regular breaks while sanding. This prevents excessive exposure to dust and helps reduce the strain on your eyes and body from the vibrations of the sander. Always remember, it’s ideal to put safety first. Regardless of your skill level or experience, don’t take any unnecessary risks when it comes to your health and well-being.
What to do in case of an equipment malfunction
Equipment malfunction is not an uncommon occurrence when dealing with power tools such as an Orbital Sander. If the unexpected occurs, it’s vital to know how to respond quickly and accurately to avoid personal injury and further damage to the tool.
Firstly, if you notice anything unusual about the operation of your Orbital Sander, halt its usage immediately. This could include strange noises, erratic movements, or visible damage to the sander or sandpaper. The longer you ignore a red flag, the greater the risk becomes.
Secondly, always refer to the manufacturer’s manual that comes along with your Orbital Sander. Most manuals provide troubleshooting guides which can prove very useful in diagnosing common issues. In case of a malfunctioning motor or a problem that isn’t easily resolved, it’s always smarter to send the tool for professional service or repair rather than attempting to fix it yourself. You wouldn’t want to inadvertently void your warranty, or worse, injure yourself.
Thirdly, keep the manufacturer’s customer service number readily available. Reaching out to the manufacturer can help you get professional advice on the next steps to take. They can also guide you on safe handling of the sander if it has developed a malfunction.
Finally, remember to not use the Orbital Sander again until its safe usage is confirmed, either after self-clearance of minor issues or a professional repair service for major ones. An Orbital Sander is an excellent tool, but like all power tools, it needs to be used responsibly.
Conclusion
Recap of the process and its benefits
Leveraging an orbital sander for concrete surfaces proves beneficial in both efficiency and effectiveness of the task. The tool’s advanced technology helps deliver clean, smooth, and uniform results. The process, as outlined, involves the preparation of the surface and the safety gear, followed by the selection of the appropriate sandpaper, careful sanding, and post-operation cleanup. It’s a user-friendly tool especially designed to minimize mess and ensure a superior sanding experience.
The use of an orbital sander optimizes time, maintains health and safety standards, and potentially saves on professional service fees. It’s a worthy addition to the toolkit of DIY enthusiasts, promising not just an accomplishment of a task, but the satisfaction that comes with a neatly done, professional-grade work. With some preparedness, understanding, and mindfulness, anyone can sand concrete effortlessly and safely using an orbital sander. It’s a highly-recommended practice for those aiming for top-notch, seaml-ess, and spark-ling concrete finishes.
Encouragement of DIY enthusiasts to try sanding concrete with an Orbital Sander
Now that you understand the process of sanding concrete using an orbital sander and the multitude of benefits it brings, it is time to put your DIY skills into action. Opting to manually tackle home improvements and renovation projects like this not only saves you money, but it can also be an immensely rewarding experience.
Remember, don’t be intimidated by the process. With the right tool, proper safety measures, and patient application of skill, you can totally achieve professional-grade results. The orbital sander, with its easy-to-use nature and effective sanding abilities, is truly a DIY enthusiast’s ally.
So, the next time you’re facing a concrete surface in need of a pick-me-up, don’t hesitate to take on the challenge of sanding it down with an orbital sander. Bring life back to your once dull and bumpy concrete areas and transform them into smooth, visually appealing spaces.