Thinset refers to an adhesive mortar made up largely from cement, fine sand, and a water-retaining component used to secure tile to surfaces such as concrete or cement backer board. This substance, also known as thinset mortar or thinset adhesive, is crucial in tile installation projects, ensuring the tiles adhere securely and evenly. Thinset is particularly favored for its resilience and flexibility which allows it to accommodate minor shifts in surface without undergoing damage or causing the tiles to crack. It is also moisture-resistant, making it an excellent option for bathrooms, kitchens, and other areas prone to water exposure.
Importance of Thinset Removal
Thinset, a type of adhesive mortar, plays a crucial role in laying tiles and stone to surfaces. Over time, this binding material may degrade, leading to crumbling tiles, loose stonework, and an overall compromised integrity of the structure. Therefore, the removal process of this adhesive layer is vital in ensuring successful home improvement or remodeling tasks.
Removing thinset is not as simple as it might seem and can prove to be a hefty and time-consuming task if not done properly. This removal process is vital not only to maintain the aesthetic appeal of your floors, but also to avoid any bumps or unevenness underneath new coverings, as these can cause instability and eventually lead to damages. Thus, the process of thinset removal plays a pivotal role in foundational work, making it a necessity for those looking to renovate, remodel or simply maintain their homes and other structures. Correct thinset removal paves the way for a smooth, even surface that’s ready for new installations, sprucing up the overall look and value of the space.
Understanding Thinset Removal Tool
Brief Explanation about Thinset Removal Tool
Thinset removal tools are specialized equipment designed to remove thinset mortar, a binding material commonly used to adhere tiles to surfaces in home construction projects. The tool effectively grinds, scrapes, or chips away at the thinset once the tiles have been removed, helping prepare the surface for new installation or finishing. Thinset removal tools can either be hand tools (like a hammer and chisel) or power tools (for example, an oscillating multi-tool or a rotary hammer). This variety of tools allows you to choose the most appropriate one based on the scale of your project and the type of surface you’re working with. The primary aim is to achieve a clean, smooth surface free of residual mortar without causing unnecessary damage. Regardless of tool type, efficient thinset removal is all about precision, patience, and using the right removal tool.
Specific Types of Thinset Removal Tools
There are several specific types of thinset removal tools available in the market, each built to handle distinct tasks and surfaces. We can categorize these tools into: manual tools and power tools.
Manual tools are suitable for light-duty work or smaller areas. They include floor scrapers and chisel and hammers. A floor scraper is a long-handled tool topped with a wide blade, effective for scraping thinset off the surface. Chisels and hammers, on the other hand, are ideal for removing thinsets from corners or tight spaces.
Moving to power tools, they are designed for larger and heavy-duty tasks. These tools typically include rotary hammers, air chisels, and grinder with diamond cup wheel. A rotary hammer uses an electric motor to drive a bit that chips away the thinset. These are rather loud but highly efficient. An air chisel, also known as an air hammer, uses pressurized air to remove thinset, a great option for large areas. Lastly, a grinder with a diamond cup wheel can also be used in thinset removal, the diamond coating on the wheel efficiently grinds away the thinset.
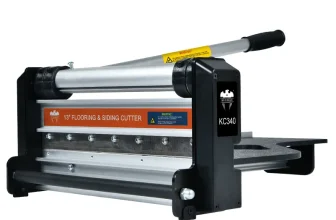
Lastly, thinset removal machines are the best choice for very large jobs. Machines like the walk-behind style of thinset removal machines are perfect if you’re dealing with a large square footage.
Choosing the right tool greatly depends on the extent of the task at hand, so understanding the pros and cons of each tool can help choose the most suitable type for your needs.
Features of Thinset Removal Tools
Physical & Functional Characteristics
Thinset removal tools are typically composed of heavy-duty materials like steel or tough plastic to endure the rigors of scraping off hardened thinset. One common design features a long handle with a head that has a sturdy, sharp-edged blade, which facilitates efficient thinset scraping. Some tools come with adjustable heads to provide maneuverability, allowing you to breakdown thinset in hard-to-reach areas.
Regarding functional characteristics, the amount of pressure required to use the tool effectively can be variable. Certain high-end models often feature comfort grips and anti-vibration handles, reducing user fatigue over time and making the task more manageable. Meanwhile, other models include dust shrouds to prevent thinset debris from spreading in the environment.
Furthermore, some models have been engineered for multi-functionality. Beyond thinset removal, they may also be compatible with attachments for tile chipping or hardwood stripping, providing added value for the user. Depending on the product, they may need a power source to operate or can be manually handled. The type chosen is usually dependent on the size of the job and the user’s preference.
Durability and Efficiency
Thinset removal tools are designed with durability and efficiency in mind, arming DIY homeowners and professional contractors alike with the necessary equipment for tough jobs. Made from robust materials such as hardened steel and diamond-tipped blades, these tools can withstand the repeated strain of chipping away hardened thinset. It’s not uncommon to see these tools last for several years when properly maintained and used correctly, highlighting their durability factor.
In terms of efficiency, thinset removal tools are a game-changer. They reduce the amount of time and energy spent on removing thinset compared to traditional methods like the use of a hammer and chisel. The engineering behind these tools allows for efficient removal of thinset without causing unnecessary damage to the underlying surface. For instance, some come with adjustable angles and depths that make it easier to work in corners or hard-to-reach areas. Others may have energy-absorbing handles to reduce vibration and user fatigue, increasing work efficiency.
Moreover, many thinset removal tools are powered by electricity, further boosting their efficiency. These power tools can handle large tasks at a faster rate without sacrificing precision. They often come with different speed settings, allowing the user to adjust the pace depending on the particular demands of the task. With these features, thinset removal tools stand out for their seamless blend of durability and efficiency.
Cost-effectiveness
Thinset removal tools are designed to deliver good value for money because they cut down labor costs and allow tasks to be completed swiftly and effectively. High-quality thinset removal tools reduces the amount of time and physical labor that would have been expended if one were to use a simple hand tool. This means saving on costs associated with labor or outsourcing the job to a professional.
Despite their seeming higher purchase price, they save you significant time and effort which, in the long run, makes them a cost-effective choice for both homeowners and professionals. Additionally, purchasing a durable thinset removal tool as opposed to renting can be more cost-effective over time, especially if you plan on doing multiple flooring or tile installations.
It’s also important to mention that these tools are built to last and withstand wear and tear with minimal maintenance costs. Therefore, the initial capital invested in buying a thinset removal tool can be spread out over its durability, thereby making it a worthwhile expenditure.
Nonetheless, one can also find budget-friendly options in the market that may not pack as much power or durability as the more premium ones, but can serve light usage needs effectively. Keeping in mind the balance between cost and efficacy is key in realizing the overall cost-effectiveness of these instruments.
Using Thinset Removal Tools
Preparation before Using the Tool
Before you dive straight into the task of thinset removal, there are several preparatory steps you should take to ensure your safety and the efficiency of the task at hand.
Firstly, clear the area where you’ll be working. This means removing furniture, decorations, or obstacles that could potentially be in your way. This will provide a safer environment and make it easier for you to move around while you’re working.
Next, it’s important to safeguard your space against dust and debris, which is likely to be produced during the thinset removal process. This may involve sealing off the working area with plastic sheets, covering air vents, or moving sensitive items away from the space. Maintaining a clean working environment minimizes the risk of inhaling harmful dust particles and makes the cleanup process much easier.
Now it’s time to gear up. Safety should always be your highest priority, so make sure you’re properly equipped with safety goggles, a dust mask or respirator, and durable work gloves. Ear protection may also be another necessary item to consider, particularly if you’re using power tools.
Last but not least, prepare your thinset removal tool by ensuring it’s in good working condition. For power tools, this could mean checking to see if the power cord or battery is intact and operational. For manual tools, this could mean making sure the blade is sharp and secure.
By taking the time to fully prepare before starting your project, you can work more efficiently and safely, making the task of thinset removal go more smoothly.
Step-by-step Guide on How to Use
Begin by placing the thinset removal tool onto the surface of the thinset you want to remove. Ensure the blade is at the right angle; it should be almost perpendicular to the floor to maximize its efficiency.
Switch the tool on and navigate it slowly over the thinset. Do not apply too much pressure but let the machine do the work. Move in a side-to-side motion to break up the thinset thoroughly.
Once you have loosened a significant amount of thinset, use a floor scraper to gather and dispose of the debris. It’s crucial to remove the broken thinset pieces before they harden and stick to the surface.
Repeat this process, working in small sections until you have removed all the thinset. Remember to give your tool rest intervals to prevent overheating.
After the thinset is completely removed, you may find a layer of dust on the surface. Clean this with a shop vac and then mop the area for a thorough cleanup.
Keep in mind, the process of thinset removal can be demanding and time-consuming, depending on the size and condition of the area. So, abide by the rules of patience and consistency for an effective and efficient thinset removal project.
Safety Precautions when Using Thinset Removal Tools
Just like any other DIY project, safety should be the utmost priority when using thinset removal tools. The first step to safety is using protective gear. Ensure you wear heavy-duty gloves to protect your hands from sharp edges and flying debris. Additionally, safety glasses or goggles are essential to safeguard your eyes from dust and small particles that might fly off during the removal process.
Another key safety measure is to keep your working environment clean and clear. This helps to prevent accidents such as slipping or tripping over material or equipment. It’s also crucial to ensure your removal tool is in good working condition before starting. A malfunctioning tool can pose a safety risk.
Remember that the thinset removal process can be noisy, so consider using earmuffs or other types of hearing protection. Also, it’s important to take frequent breaks to prevent fatigue which could lead to careless mistakes.
Finally, if you are using electrically powered removal tools, be certain to use Ground Fault Circuit Interrupter (GFCI) protection to reduce the risk of electric shocks. It’s important to always be conscious of where your power cord is lying to avoid tripping over it or cutting it with the removal tool.
Overall, while thinset removal tools make the job much easier, they must be used with caution and respect for safety measures. Each tool carries its own set of risks and potential hazards, so it’s important to understand how to use them safely to prevent accidents.
Selection Guide: Choosing the Right Thinset Removal Tool
Factors to Consider in Choosing a Thinset Removal Tool
When choosing a thinset removal tool, there are several critical factors to consider to ensure you get a device that will effectively cater to your needs.
Firstly, make sure to consider the type and size of the project. If you need to remove thinset from a large area, then a big, more powerful tool, such as a hammer drill or a demolition hammer, would be your best choice. For smaller projects, precise tools like hand scrapers or smaller power chisels may suffice.
Second, you must reflect on the tool’s robustness and resilience. Thinset removal is a demanding task. Therefore, your chosen tool should be durable and capable of withstanding extended use without faltering.
Third, the tool’s comfort and ease of use are also extremely important. Removing thinset can be a tedious and grueling task, but a comfortable and easy-to-handle tool can make the job much more bearable. Look for features such as ergonomically designed handles, adjustable speed settings, and anti-vibration technology.
Your budget is another important consideration. There’s a wide variety of thinset removal tools in the market with prices ranging from affordable to quite pricey. However, remember a higher price tag does not always guarantee better performance or durability.
Finally, consider what type of surface you’ll be working on. Some tools are better suited for certain surfaces, while others offer more versatility. Doing your research will help you make an informed choice.
Remember that the right tool can significantly impact the efficiency and quality of your work, making it essential to consider these factors carefully before making a purchase.
Best Brands and Models in the Market
When it comes to the top brands and models in the market for thinset removal tools, a few notable ones stand out for their superior performance, reliability, and user satisfaction.
-
Bosch: Known for their robust construction and powerful performance, Bosch thinset removal tools are a common favorite among professionals. Particularly, the Bosch 11321EVS SDS-Max Demolition Hammer is often lauded for its versatility, durability, and overall efficiency.
-
DEWALT: DEWALT’s thinset removal tools are designed with user comfort in mind. The DEWALT DCH273B 20v Max Brushless SDS Rotary Hammer has a well-engineered vibration control system that reduces user fatigue and enhances work efficiency.
-
Makita: Makita is another brand trusted by many for its mix of power, endurance, and ease of use. The standout model from Makita is their HK1810 5 lb. Variable Speed Power Scraper, greatly effective at removing thinset along with other materials.
-
Pearl Abrasive: Pearl Abrasive may be less known than other brands, but its removal tools, especially the Pearl Abrasive Hexpin® Carpet Pad, does not fall short when it comes to thinset removal. Its unique design enables it to efficiently scrape off thinset from various surfaces.
-
Dremel: Dremel’s versatile and compact tools, like the Dremel MM500 1/8-Inch Multi-Max, are great for smaller, DIY projects. This model is recognized for its precision and ability to maneuver in tight spaces.
While these brands and models top the list, personal preference, specific job needs, and budget should also steer your decision when choosing the right thinset removal tool.
Proper Maintenance of Thinset Removal Tools
Cleaning and Storage
Keeping your thinset removal tool clean and properly stored is integral to maintaining its durability and performance. After each use, clean the tool of any leftover thinset to prevent residue build-up which can affect future tasks. You can use a stiff brush and warm soapy water for most cleaning tasks, while for tougher residues, a specially designed cleaning solution may be required.
It is important to completely dry your tool after cleaning to prevent rust formation. Using a dry cloth or an air compressor can remove excess moisture effectively. Once the removal tool is clean and dry, applying a thin layer of oil can prevent rusting and keep the tool in good working condition.
In regards to storage, it is best to keep your thinset removal tool in a clean, dry environment. Protect it from harsh weather conditions and moisture. If possible, store each tool in a separate compartment to avoid clattering and scratching against each other. For larger tools, hanging them on a wall can be a space-efficient storage solution. The proper maintenance of your tool is a small investment that can significantly extend its lifespan and ensure its readiness for your next project.
Fine-tuning and Repairs
Just like any other tool, Thinset Removal Tools require close attention in terms of fine-tuning and repairs. This all-important process ensures the tool operates at maximum efficiency.
Fine-tuning of Thinset removal tools generally involves adjusting certain parts of the device like the drive system or the blade area. This can be achieved by following the manufacturer’s manual with all tools requiring a certain degree of specificity in their adjustments. It is essential to motivate optimum performance, reduce unnecessary friction and prevent premature wear and tear.
Speaking of wear and tear, repairs are an inevitable part of maintaining any device, including Thinset Removal Tools. These tools are subjected to intense conditions that may lead to damages – minor or major. When such instances occur, it’s advisable to have the tool repaired by a professional, especially if it involves integral segments of the tool, like the motor or the drive system. Routine checks for potential issues such as loose parts or dull blades can help identify required repairs before they become larger issues.
A common aspect of both fine-tuning and repairs that cannot be overlooked is consultation. Always consult the tool’s user manual or seek professional advice when unsure about what steps to take.
Remember, regular fine-tuning and prompt repairs contribute significantly to the longevity and effectiveness of your Thinset Removal Tool.
Lifespan of Thinset Removal Tools
The lifespan of thinset removal tools can vary considerably based on several factors. These primarily include the quality of the tool, frequency of use, the material it’s used on, and, most importantly, how it’s maintained.
Generally, high-quality, commercial-grade thinset removal tools are engineered to withstand harsh conditions and heavy use, which makes them last longer compared to less expensive versions. If used moderately on standard materials like plaster, ceramic tile adhesives, or mortar, these tools can serve you for several years. However, if the tools are often used to handle tougher materials like stone or porcelain tile adhesives, their lifespan may be shortened.
Remember that just like any other machine, these tools are not invincible. Inconsistent maintenance can dramatically decrease their lifespan. Regular and proper cleaning, lubricating the moving parts, and replacing worn-out parts in time can add years to your thinset removal tool’s life. Therefore, investing your effort and time in maintaining your tool will ensure that it stays in optimal condition for many years to come.
However, every tool has an expiration date. And when they reach that point, their performance gradually deteriorates, making the removal process more laborious and less efficient. Consequently, you should keep an eye on the tool’s performance and consider replacing it when you start noticing persistent underperformance, even after maintenance.
So in conclusion, the lifespan of a thinset removal tool can be many productive years, given that it is a high-quality tool, used correctly, and well maintained.
Benefits and Risks of Using Thinset Removal Tools
Advantages of Using Thinset Removal Tools
Using thinset removal tools can offer numerous benefits, primarily by making your task significantly easier and more efficient. Such tools are designed to effectively remove thinset, the bonding agent that secures tiles to a surface, with relative ease. They can significantly reduce the amount of time and physical labor required for the job, as well as minimize user fatigue. What might take hours with a hammer and chisel can be accomplished much faster with a thinset removal tool.
Another key advantage is precision and control. Thinset removal tools are designed to provide a high level of accuracy to prevent unwanted damage to the tile or the surrounding surface. With the appropriate tool, you can precisely target specific areas, ensuring that only the thinset is removed while the tile remains intact.
Thinset removal tools also encourage better work safety. When used correctly, these tools can significantly minimize the risk of injury that comes with using basic hand tools like hammers, chisels, or scrapers.
Lastly, these tools can be quite versatile. Many thinset removal tools are designed to be multi-functional and can be used to remove various other materials such as grout, plaster, adhesives, coatings, and more, making them useful for a wide range of tasks in home improvement or professional renovation projects.
Potential Downsides/Risks
While thinset removal tools offer a significant number of benefits, it’s worth noting that they also come with their share of potential downsides and risks. One downside is the potential for damage to the underlying structure. Careless usage or a lack of proper training can yield to unintended damage to the substrate or the adjacent structures.
The severity of potential risk also extends to personal harm. Given that these tools are mechanically powered, improper handling could lead to potential injuries. The use of certain thinset removal tools may generate dust, posing a risk to the operator’s respiratory health if adequate protective measures are not taken. The noise generated by these tools can also be detrimental to one’s hearing over a prolonged period, and therefore requires users to wear appropriate ear protection.
Last but not least is the operational cost. Some of the high-end models of thinset removal tools are quite expensive. Additionally, certain advanced models may have parts that wear out after extensive use, requiring replacements that add to the overall cost. It’s important therefore to weigh these potential downsides against the benefits when considering using thinset removal tools.
Conclusion
Recap of Key Points
We’ve explored the multifaceted aspects of a thinset removal tool, underscoring its crucial role in construction and renovation projects. This tool is designed specifically for the effective removal of thinset, a type of cement used to adhere tiles or natural stones to surfaces. We delved into its various types, each with its unique characteristics and special features. The physical and functional characteristics, durability, and cost-effectiveness were also discussed in-depth.
In addition, we provided a comprehensive guide on how to properly use thinset removal tools, from preparations and the actual usage procedures to safety precautions. We also shared tips on selecting the optimal tool suited to one’s needs, highlighting the best brands and models, and shedding light on the important factors to consider when purchasing. Lastly, we touched on the importance of proper maintenance for longevity and the various benefits and potential risk factors associated with these tools. We trust that this comprehensive guide will be beneficial in your home-improvement tasks or professional projects.
Final Thoughts on the Importance of Thinset Removal Tools
Thinset removal tools have become integral assets in the arsenal of professionals and DIY enthusiasts alike. These tools are specifically engineered to handle the gruelling task of removing thinset, which is a crucial aspect of any renovation or refurbishment process involving tiled surfaces. Without the correct tool, thinset removal can become an exhausting and time-consuming task, which can result in shaky results, increased costs, and even potential damage. But with the precise removal tool, the job becomes more efficient, promoting safety, cleanliness, and quality in the end result.
So whether you’re tackling a minor home improvement project or a professional contractor entrusted with a significant renovation job, investing in a reliable thinset removal tool can significantly enhance productivity and the overall outcome. It is vital to remember, however, that the value of these tools is not only measured by their upfront cost, but in their long-term durability, effectiveness, and maintenance requirements. Therefore, choosing the appropriate tool that aligns with your particular needs is paramount. Confirming once more that, in the world of construction and renovation, the right tools make all the difference.