One of the horror stories associated with fishing expeditions is being stuck out on the water because of a dead battery. Besides that, your trolling motor battery life can determine if you’ll have a good fishing day or return to shore empty-handed.
So, before you load your boat to sail out on the lake, it’s important to have your bases covered. We’ve outlined the steps to follow to charge your trolling motor battery even in an emergency. But first, you need to establish the type and battery design you have. This will help determine the best charger and charging method to use.
Types of Trolling Motor Batteries
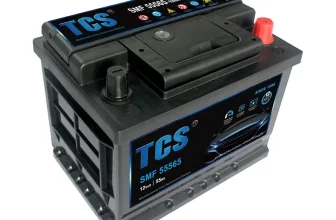
The best battery type to power a trolling motor is the deep-cycle battery. This battery type is designed to withstand frequent charges and discharges and provides stable energy for longer periods. It delivers low to moderate currents over a long period, making it the better option for a trolley motor. Some common types of deep-cycle batteries are:
Lead Acid Wet Cell Batteries
These batteries are the cheapest and can handle frequent recharge and draining. Therefore, they are the commonest option. However, these battery types require regular maintenance.
You need to keep the terminals clean to prevent corrosion and check the water levels in the cells. They can also leak and spill if not properly positioned.
Absorbed Glass Mat (AGM) Batteries
AGM batteries are completely sealed, so there’s no risk of spilling them. They can last up to four years, which is more than lead acid batteries. However, they are expensive, often double the price of a lead acid battery or more.
Lithium Marine Batteries
These batteries are an attractive option because they are lightweight, efficient, and fully sealed. However, they pose certain safety risks and are very expensive. Lithium batteries can easily catch fire. Moreover, you can’t douse it with lake water. Only a dry chemical or foam extinguisher will work. As such, your boat may suffer serious damage before you put out the fire.
Tools Needed for Charging a Trolling Motor Battery
To properly charge your trolling motor battery, you need the following tools:
- A deep-cycle battery
- A battery charger with banks to match the batteries in your trolling motor
- A power outlet, whether an extension cord or a wall power socket, if your charger cable is long enough.
- Clean rag to clean or dry the battery terminals
- Rubber gloves to keep yourself protected
Types of Trolling Motor Battery Chargers
You need the right equipment for charging your trolling motor battery. The type of charger you need depends on the number and types of batteries you have.
Opt for chargers with multiple banks in case your trolling motor uses more than one battery. The reason is that they can charge two or more batteries at a time, saving you time and energy. Below, we consider the common types of trolling motor battery chargers:
Portable Chargers
This charger is best suited for small boats with limited storage, like kayaks and inflatable boats. You can carry it on your fishing expeditions and hook it to your outboard motor.
Onboard Chargers
An onboard charger is a convenient alternative, as it is always attached to your battery system. You can charge it on the water and avoid unexpected dead battery issues. However, they are better suited for bigger boats with an outboard engine.
Solar Chargers
Installing a solar panel on your boat allows you to charge your trolling boat battery using direct solar energy. However, you will need some kind of charger controller to keep the voltage at a balanced level. Otherwise, the unregulated voltage can damage your battery.
Smart Chargers
Smart chargers are an advanced charging system and can help prolong your battery life. These chargers feature an automatic temperature regulator that releases output based on the battery’s temperature. They also have inbuilt short circuit protection that prevents the battery from operating when not properly hooked. With these chargers, the risk of overcharging is reduced, and LED displays show the stage of the charging process.
Charging a Trolling Motor Battery at Home
These are the basic steps for charging your deep cycle trolling motor battery at home using a smart charger:
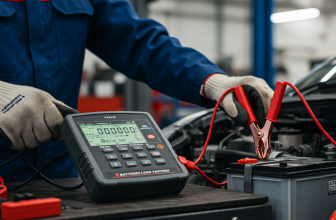
Step 1: Inspect the Battery
Inspect your battery for any damage or leaks; take off the lid from your battery box and check for buildup. Then, clean all your battery terminals; check for grease or dirt and remove them. Buildup on your battery terminals is dangerous and can cause connection issues. Therefore, clean any corrosion with a mix of baking soda and water.
Step 2: Disconnect Every Appliance
It’s not advisable to fiddle with your battery while the trolling motor is running. Before you start, disconnect all the cables from the terminals. Then, check if there is a switch on the battery box that you need to place in the ‘OFF’ position.
These steps are vital, as they can help prevent electrical damage or a sudden power surge.
Step 3: Connect the Charger
The third step is to connect the charger clips to your trolling battery’s terminals. The order with which you connect your battery terminals to the charger clips matters to prevent malfunctioning.
Connect the red wire to the positive terminal and the black cable to the negative terminal. Note that the order of disconnecting after charging is the reverse of the above step.
Step 4: Check Charger Settings
Before you turn the charger on, ensure the settings are properly configured. So, it’s advisable to read the manual first. You may even need to adjust a few things, as not every battery charges the same.
This explains why most chargers have a selector button. This way, you can set the charging algorithm to fit the particular battery you want to charge. For example, you can set it to fit a six(6), twelve(12), or twenty-four (24) volt deep cycle battery.
Step 5: Turn the Charger On
Before you turn on the charger, go over everything again for the last time. Verify there is no corrosion and that the cables are hooked correctly. You also want to verify that your battery type and charger are a perfect fit.
If everything checks out, you can proceed to turn on the charger and wait. With a smart charger, it becomes hand-free from this point. There’s no need to worry about disconnecting your charger at the right time or setting amps. The smart charger calculates the best frequency to charge your battery, and the LED display shows current progress.
Step 6: Disconnect the Charger
Once the LED lights indicate the battery is full, you’re ready to head back out on the water. Turn off the charger and unplug the cables from the battery terminals. Start with the negative terminal first before disconnecting the positive one.
The charger’s amp output, your battery capacity, and the amount of remaining charge determine how long your battery will take to charge completely. So, suppose your charger charges at 5 amps, and your battery is a 50 Ah battery at 50% full. Your battery will be fully charged in a little over five hours.
Charging a Trolling Motor Battery Using Solar Panels
Follow the steps below when you need to use a solar charger to charge your trolling motor battery.
Step 1: Place the Solar Panel in Sunlight
Before charging, ensure that the solar panel is facing direct sunlight. This way, it can absorb maximum energy, enough to power your battery.
Step 2: Unplug the Battery from Your Motor
To avoid damaging your trolling motor, disconnect the battery before you start charging.
Step 3: Connect the Charger to Your Battery
Find the tables attached to your solar charger and connect them to your battery. Latch the positive cable to the positive battery terminal. Then, connect the negative cable to the negative terminal.
Step 4: Turn On the Power Switch
Locate the power switch on your solar charger and turn it on. The current will flow directly from the solar panel to the battery. However, this charging method can be slow, as solar panels do not supply much power.
Charging a Trolling Motor Battery from the Outboard Motor
One way to recharge your trolling motor battery while on the water is by charging with the outboard motor. Moreover, there are two ways to connect them, either upgrading your outboard motor or using a battery combiner.
Upgrading Your Outboard Motor
Upgrading an outboard motor means installing a regulator or rectifier on the motor. This converts power from the trolling motor to an AC/DC.
The right method for wiring your regulator depends on the type of motor that you have. However, despite your wiring method, you’ll still have two types of connections. The regulator/rectifier’s green AC wires will connect to the outboard motor first. Then the red and black wires will connect to your trolling motor battery.
To mount the regulator, connect these green wires to existing connector cables under the flywheel. Then attach the ground wire to the appropriate place. Alternatively, you can get a professional to mount it for you.
After attaching these to the outboard motor, connect the negative and positive wires to the matching wires inside the cable. This connecting cable will run from the outboard motor to your trolling motor battery.
Attach crimp connectors to the black and red wires at the cable’s other end. Then latch these connectors to the negative and positive points on the battery.
Using a Battery Combiner
Using a battery combiner is a less stressful way to direct charge from your outboard motor to the trolling motor battery. Most outboard motors have a starter battery which gets a regular charge from the motor’s alternator.
A battery combiner helps your starter battery share a connection with another battery, like your trolling motor battery. Look at it like giving your car a jumpstart.
First, you find a battery that gets a continuous charge from the car engine. Then, using jumper cables, connect it to a dead battery that needs charging.
A battery combiner, in this case, works like the jumper cable. It typically has four lead lines, two red and two black ones. All you have to do is to latch the black lines to the negative terminals on each battery. Then, hook the red lines to the positive terminals.
Guidelines for Preserving Trolling Motor Battery Lifespan
Do you want your trolling motor batteries to last you a while and perform better? Then, keep the following maintenance tips in mind:
- Fully recharge your motor batteries after use. Leaving your batteries below 12.4 volts for a long time can cause lead sulfate to form in the cells, affecting the battery’s longevity and effectiveness.
- Allow your trolling motor battery to cool after a charge. Charging sessions produce heat in the cells, and immediately using a hot battery can damage it.
- If you have a lead-acid battery, check the water levels monthly. Top them with distilled water if they start getting low.
- After every recharge, equalize the charge, so the battery cells are balanced.
- Keep power flowing regularly in the off-season with a trickle charger. Or, recharge your battery once a month.
- Try to drain your battery and recharge fully once in a while. Constant partial charges can cause the battery cells to go out of balance. The acid falls to the bottom of the battery, limiting its performance and lifespan.
- Clean the battery and its terminals before storage.
- Store your trolling motor batteries in a dry, room-temperature environment.
- Routinely inspect your battery for cracks or other signs of damage.
- Invest in high-quality chargers.
- Use your trolling motor in calm waters, as strong currents require more power. This can drain the battery faster, requiring frequent charges.
Conclusion
When charging your trolling motor battery, observe all necessary safety precautions. Remember that it is safer to connect the charger to your battery before plugging it into the power source. Following the practices recommended in this guide can help preserve your battery life over time.